Fennel, Apple, Arugula Salad

Photo Credit: Kitchen Stories

Photo Credit: Kitchen Stories

Some good things to know about fennel:

  • It’s high in fiber and vitamin C

  • It helps eliminate bad breath

  • It helps regulate menstruation and balance hormones

  • Increases brain function

  • Helps digestion

And it’s a wonderful and tasty vegetable! One of my favorite ways to serve fennel is shaved into salads, and this Fennel Apple Arugula Salad recipe is a winner!


Ingredients

  • 1 large fennel bulb

  • 2 celery stalks

  • 1 apple

  • ¼ cup pine nuts

  • ¼ cup olive oil

  • 2 tsp honey

  • 1 lemon (juiced)

  • 4 cups arugula

  • Shaved parmesan cheese (for garnish)

  • Salt and pepper to taste

Instructions:

  1. Using a Mandolin: Trim and thinly slice fennel bulb, thinly slice the celery, core and thinly slice the apple

  2. Toast pine nuts over medium heat until golden brown and fragrant, then set aside to cool.

  3. In a small bowl, combine olive oil, honey, lemon juice and salt and pepper until emulsified. Add fennel, celery, apples, and arugula to a large bowl. Toss with dressing until combined, then adjust seasoning as needed.

  4. Transfer salad to a serving platter and garnish with shavings of parmesan and pine nuts.

Comment

Co-Founder | Nutritionist

Lisa is the Co-Founder and Nutritionist at Tuesday Foods. Always dressed for action in her workout clothes, Lisa found her calling as a fitness and nutrition expert from her background in the sport of gymnastics – learning early on that how you feel, and how well you perform is directly related to what you eat, and how you move your body every day. A former competitive gymnast and coach, Lisa holds a BS in Exercise Physiology, a MS in Nutritional Science, and is a Certified Nutritionist and Health Coach.

Print Friendly and PDF

Chickpea and Cauliflower Coconut Curry

shutterstock_1080258524.jpg

Ingredients

  • 2 Tbsp extra virgin olive oil

  • 1/2 of 1 yellow onion, chopped

  • 2 cloves garlic, minced

  • ½ lemon, juiced

  • 2 Tbsp fresh ginger, minced

  • 1-2 Tbsp red curry paste (according to spice preference)

  • 2 cups light coconut milk, canned

  • 1 Tbsp curry powder

  • 1 Tbsp maple syrup

  • 1 Tbsp tamari or soy sauce

  • ½ tsp sea salt

  • ½ head cauliflower (chopped)

  • 1 can chickpeas (rinsed and drained)

  • Cooked rice (brown rice or jasmine)

  • Cilantro and lime wedges for garnish

Instructions

  1. Heat olive oil in a large dutch oven over medium heat. Add onions, shallot, garlic, sea salt and ginger. Sauté for 2-3 minutes, stirring frequently.

  2. Add curry paste and stir. Cook for 2 minutes more.

  3. Add curry powder, coconut milk, lemon, maple syrup and tamari and stir. Stir well and bring to a simmer over medium heat.

  4. Once simmering, add cauliflower and chickpeas and simmer under low to medium-low heat for 10-15 minutes, stirring occasionally, to soften the cauliflower and chickpeas and infuse them with curry flavor. Serve over cooked brown rice or jasmine rice. Garnish with fresh cilantro.


1 Comment

Co-Founder | Nutritionist

Lisa is the Co-Founder and Nutritionist at Tuesday Foods. Always dressed for action in her workout clothes, Lisa found her calling as a fitness and nutrition expert from her background in the sport of gymnastics – learning early on that how you feel, and how well you perform is directly related to what you eat, and how you move your body every day. A former competitive gymnast and coach, Lisa holds a BS in Exercise Physiology, a MS in Nutritional Science, and is a Certified Nutritionist and Health Coach.

Print Friendly and PDF

Sweet Potato + Spinach Egg Muffins

shutterstock_560510719.jpg

These healthy Sweet Potato and Spinach Egg Muffins that are portable, packed with protein, and delicious for a quick breakfast on the go!

Ingredients:
You will need 12 large baking cups!

  • 1 tablespoon coconut oil

  • 2 cups sweet potato, cubed and peeled

  • 1/2 cup white onion, diced finely

  • 1/2 teaspoon black pepper + pinch of salt

  • 3 cups spinach, very finely chopped

  • 1 teaspoon garlic, minced

  • 6 eggs

  • 1/8 teaspoon nutmeg

  • 1/4 teaspoon sea salt

  • 2 teaspoons nutritional yeast

  • 1/2 teaspoon onion powder

  • 2 tablespoons green onions, finely chopped

Directions

  1. Preheat the oven to 350 degrees F.

  2. In a frying pan with a lid, bring coconut oil to heat over medium-heat, about 20 seconds. Add the diced white onion and cook while stirring for 3 minutes.

  3. Add the salt and pepper and the cubed sweet potato.

  4. Stir well for one minute to combine all ingredients, cover and cook for 13 minutes. Check half way through, to make sure it’s not burning.

  5. Reduce heat to low-medium and add the spinach and garlic. Continue to stir together for another minute.

  6. Remove from heat and set aside to allow to cool.

  7. In the meantime, mix eggs in a bowl with the nutmeg, sea salt, nutritional yeast and onion powder.

  8. Evenly distribute the sweet potato mixture into 12 large muffin cups. Scoop the egg mixture with a 1/8 measuring cup and pour this amount over each sweet potato cup.

  9. Using a fork, gently combine and toss the egg and sweet potato mixture together in the baking cup.

  10. Top each cup with a little green onion and place in the oven.

  11. Cook for 20-22 minutes, until they are cooked through.

  12. Serve with fresh sea salt and black pepper.


Comment

Co-Founder | Nutritionist

Lisa is the Co-Founder and Nutritionist at Tuesday Foods. Always dressed for action in her workout clothes, Lisa found her calling as a fitness and nutrition expert from her background in the sport of gymnastics – learning early on that how you feel, and how well you perform is directly related to what you eat, and how you move your body every day. A former competitive gymnast and coach, Lisa holds a BS in Exercise Physiology, a MS in Nutritional Science, and is a Certified Nutritionist and Health Coach.

Print Friendly and PDF

Red Thai Chicken

shutterstock_784040386.jpg

Coconut Chicken Thai Curry

A flavorful and mild spicy chicken and vegetable thai curry recipe. Ready in under 30 minutes, and healthy too!

This is my family's current favorite meal, and trust me it will be yours too! 

Notes: This recipe is meant to serve as a base recipe for the chicken and the sauce, so plan on adding in your favorite veggies. It works well with bok choy, cauliflower, carrots or red bell peppers.  

Serve over rice, or cauliflower rice for a paleo version

Ingredients:

  • 2 lbs Chicken Thighs (skinless, boneless)

  • 1/4 cup Thai Red Curry Paste (divided)

  • 1 tbsp Coconut Oil

  • 1/2 cup Red Onion (finely diced)

  • 2 cans Organic Coconut Milk (canned, full fat)

  • Red pepper flakes (if you like it spicy)

Directions:

  1. Preheat your oven to 400 degrees F.

  2. Salt and pepper the chicken and then rub with half of the Thai red curry paste.

  3. Heat the coconut oil in a cast iron or oven safe skillet on the stovetop over medium heat. Saute the red onions in the remaining Thai red curry paste for about 3 to 5 minutes.

  4. Add the chicken thighs to the skillet and sear for 3 minutes per side. Add the coconut milk and bring it to a simmer.

  5. Add in your veggies.

  6. Once the coconut milk is simmering, transfer the skillet to the oven and bake for 15 minutes.

  7. Remove from the oven, divide the chicken onto plates and


Comment

Co-Founder | Nutritionist

Lisa is the Co-Founder and Nutritionist at Tuesday Foods. Always dressed for action in her workout clothes, Lisa found her calling as a fitness and nutrition expert from her background in the sport of gymnastics – learning early on that how you feel, and how well you perform is directly related to what you eat, and how you move your body every day. A former competitive gymnast and coach, Lisa holds a BS in Exercise Physiology, a MS in Nutritional Science, and is a Certified Nutritionist and Health Coach.

Print Friendly and PDF

Killer Cauliflower Soup - My Most Requested Recipe!

shutterstock_744561703.jpg

For an easy and absolutely delicious lunch, you just can’t go wrong with this creamy (BUT VEGAN!) cauliflower soup.

Cauliflower is so nutritious!  It is loaded with vitamins, minerals and antioxidants like Vitamin C, Vitamin K, Vitamin B6, Folate, Pantothenic Acid, Potassium and Manganese.   And guess what?  Cauliflower is also a good source of protein. 

Cauliflower & Leek Soup

Serves 8

Ingredients:

  • 3 tablespoons extra virgin olive oil

  • 2 large leeks, white and light green part only, chopped. (chop first and wash well, they are dirty inside!)

  • 2 stalks celery, chopped

  • 3 cloves garlic, finely chopped

  • 1 large head of cauliflower, cut into 2 inch florets

  • 4 cups vegetable stock (more if needed)

  • 3 cups water (more if needed)

  • 1 bay leaf

  • 2 teaspoons sea salt, more or less to taste

  • 1/2 teaspoon coarse black pepper, more or less to taste

  • Garnish with chopped chives, parsley and almonds

TO MAKE:

In a large soup pot or dutch oven, heat the olive oil over medium-high heat. Add the leeks, celery, and a pinch of salt and sauté until soft, about 5 minutes. Add the garlic, cook for another minute, stirring.  (be careful not to burn the garlic or the soup will be bitter.)  Add the stock, 2 cups water, 2 teaspoons sea salt, 1/2 teaspoon pepper and the bay leaf, then bring to a boil. Add the cauliflower florets and turn the heat to medium; simmer 30 minutes until the cauliflower is tender. Discard the bay leaf. Puree the soup in small batches in a high-speed blender (I use a vita-mix) until very smooth.  Add the pureed soup back to the pot and stir in 1/2 to 1 cup more stock or water (if needed)

Garish with fresh chopped chives and parsley.  Chopped almonds are also a great addition!

Comment

Co-Founder | Nutritionist

Lisa is the Co-Founder and Nutritionist at Tuesday Foods. Always dressed for action in her workout clothes, Lisa found her calling as a fitness and nutrition expert from her background in the sport of gymnastics – learning early on that how you feel, and how well you perform is directly related to what you eat, and how you move your body every day. A former competitive gymnast and coach, Lisa holds a BS in Exercise Physiology, a MS in Nutritional Science, and is a Certified Nutritionist and Health Coach.

Print Friendly and PDF

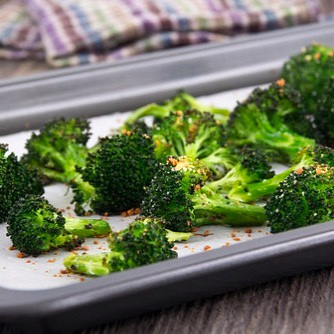
Salt and Pepper Broccoli

53553170_2638722999488076_4447384990866472960_n.jpg

This delicious roasted broccoli is an easy go-to recipe and takes little to no time to make. The broccoli is fiber filled and nutrient dense then seasoned with ume plum vinegar, a staple in Japanese culture for its salty flavor.

Ingredients

  • 2+1/2 cups broccoli florets

  • 1 tablespoon olive oil

  • 2 teaspoons ume plum vinegar

  • 1 teaspoon black pepper

  • 1 teaspoon toasted sesame oil

Directions

  1. Pre-heat the oven to 375 degrees F.

  2. Toss the chopped broccoli florets and seasonings together in a large mixing bowl, ensuring the broccoli is well coated.

  3. Place a piece of parchment paper over a baking sheet and evenly spread out the broccoli pieces.

  4. Bake in the oven for 8-10 minutes, check half way through to toss.

  5. They are finished when they are a little bit crispy on the edges and able to easily pierce a fork through the stem.

Comment

Co-Founder | Nutritionist

Lisa is the Co-Founder and Nutritionist at Tuesday Foods. Always dressed for action in her workout clothes, Lisa found her calling as a fitness and nutrition expert from her background in the sport of gymnastics – learning early on that how you feel, and how well you perform is directly related to what you eat, and how you move your body every day. A former competitive gymnast and coach, Lisa holds a BS in Exercise Physiology, a MS in Nutritional Science, and is a Certified Nutritionist and Health Coach.

Print Friendly and PDF

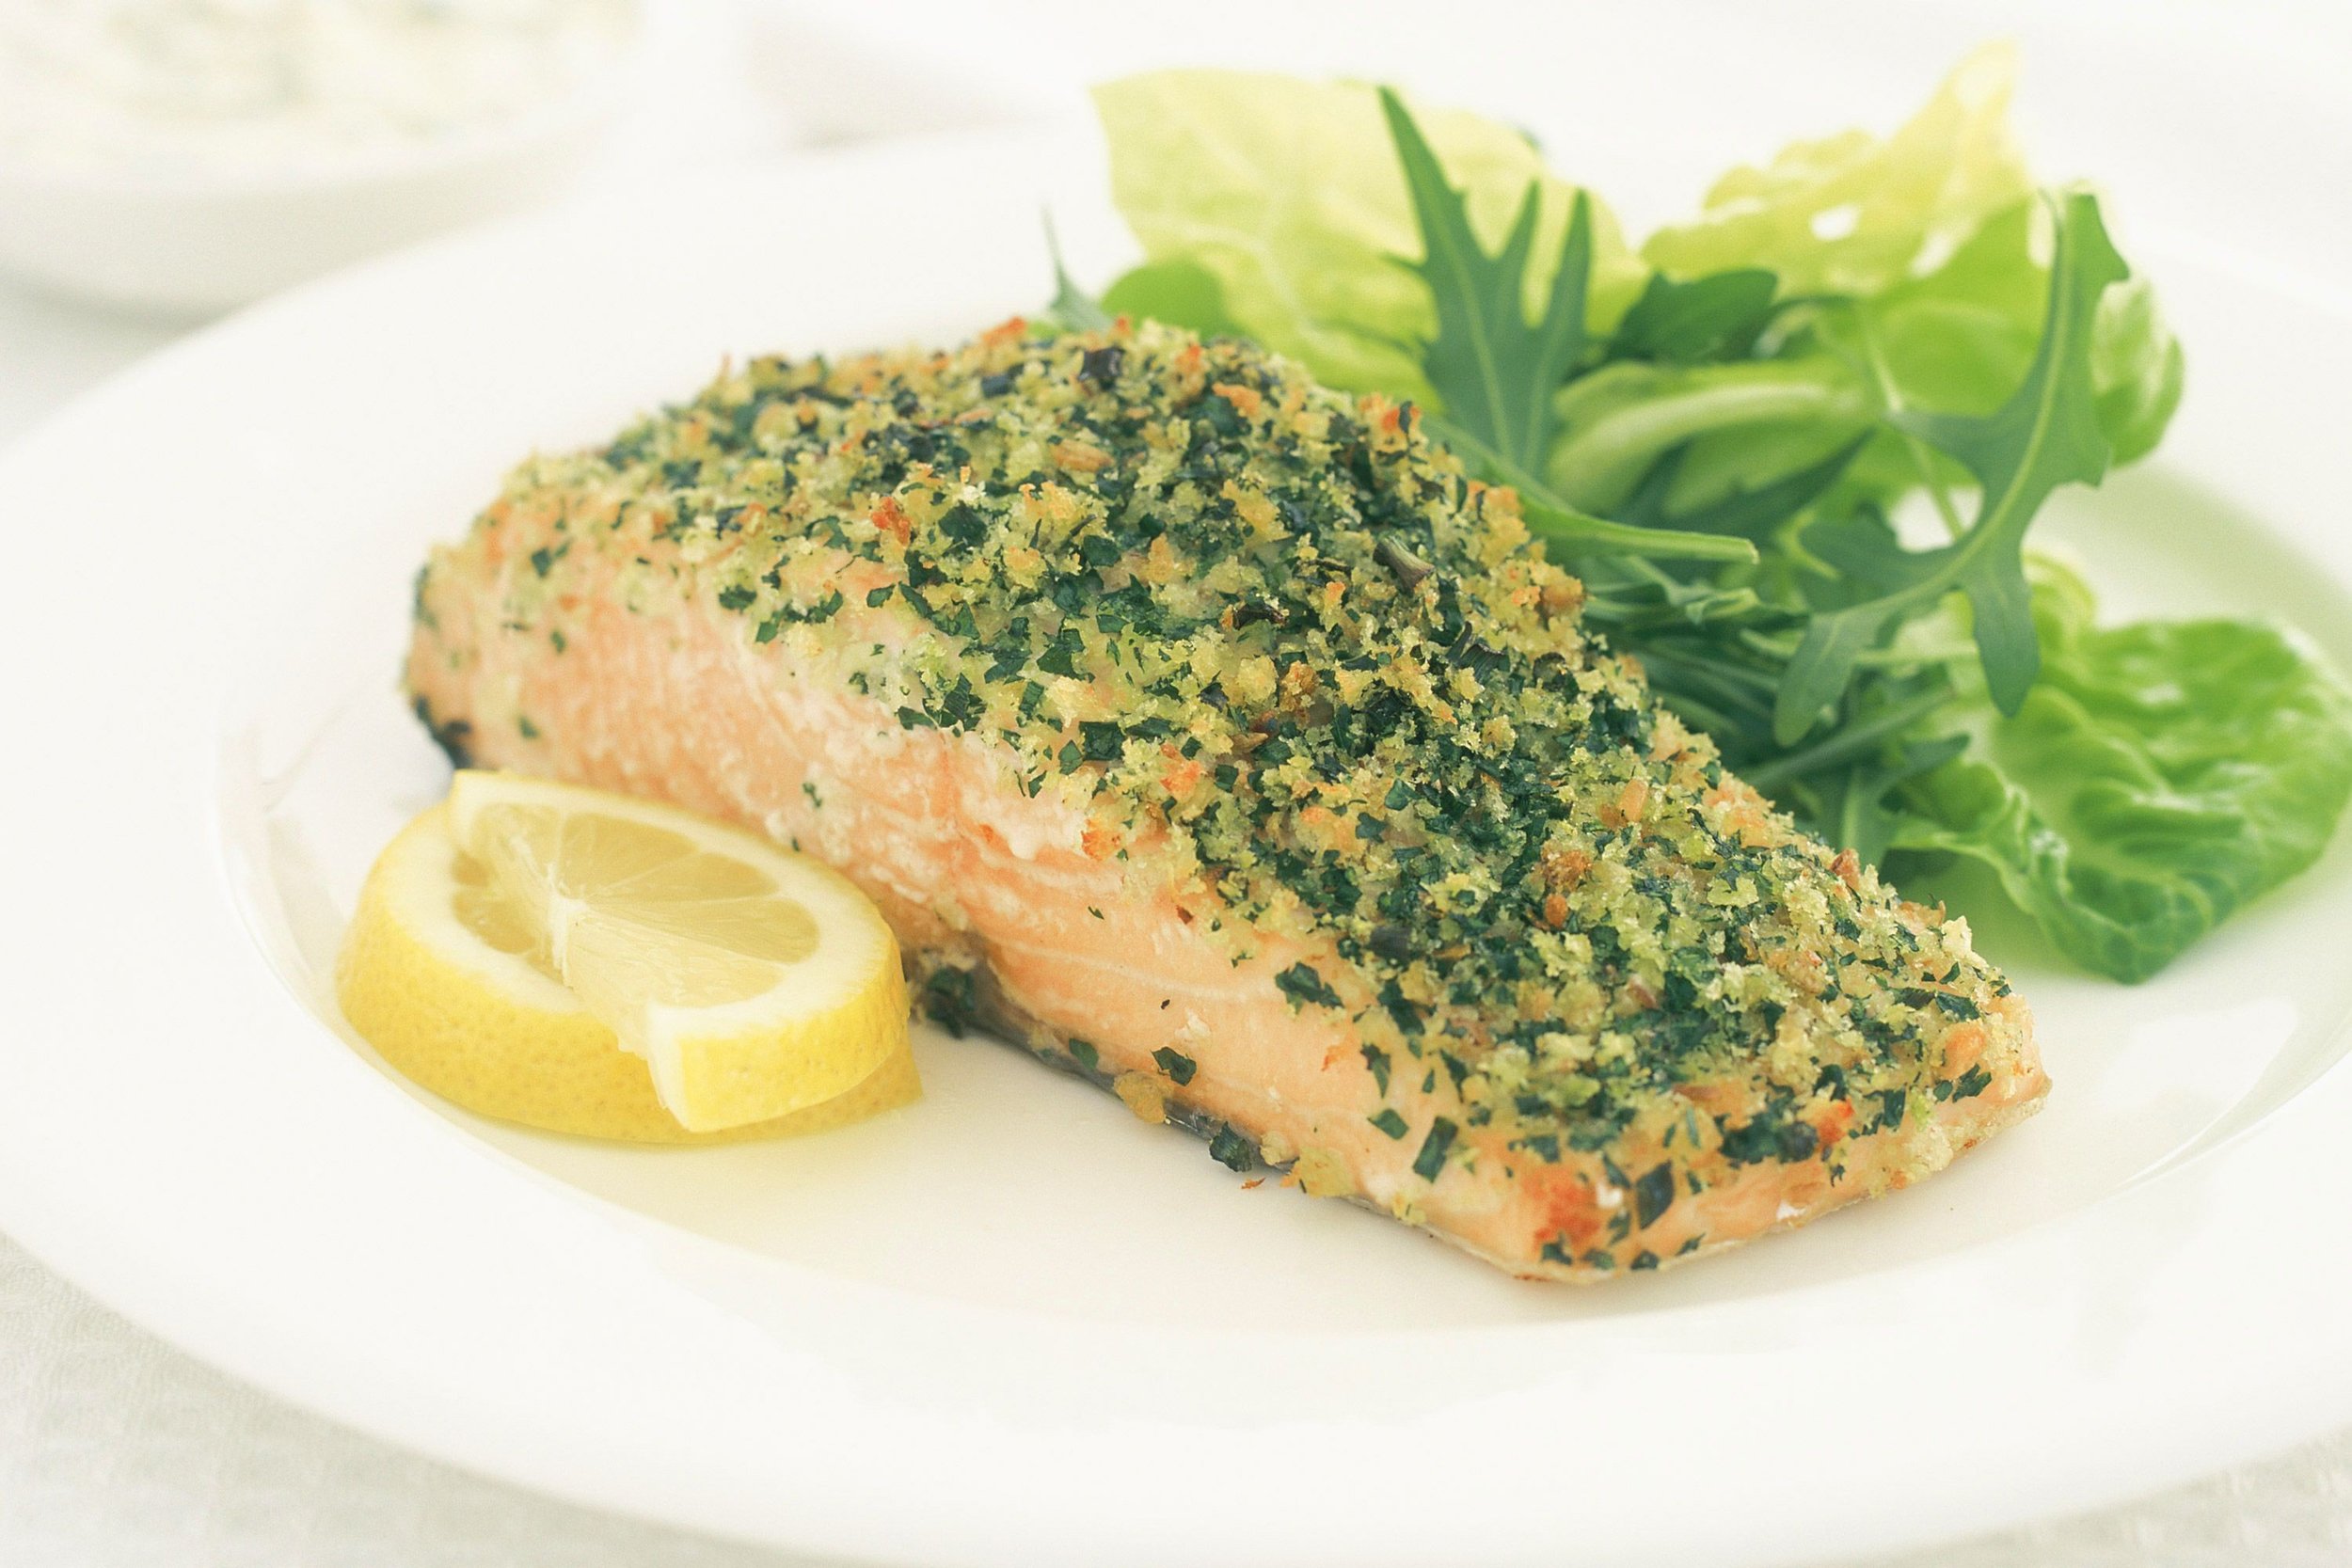
Baked Salmon with Parmesan and Herb Crust

herb-crusted-salmon-16542-1.jpeg

Ingredients

  • 1 salmon filet

  • 1 -2 cloves garlic , minced

  • 1/4 cup parsley, chopped

  • 1/2 cup finely grated parmesan cheese

Instructions

  1. Preheat oven to 425º F. Line rimmed baking sheet with parchment paper.

  2. Chop the garlic, parsley and parmesan cheese in a mini processor, if you have one. (or by hand) Set aside

  3. Place salmon, skin side down, onto lined baking sheet. Cover salmon with another piece of parchment paper. Bake salmon for 10 minutes. Remove from oven and remove top piece of parchment paper. Top with garlic, Parmesan and parsley mixture. Return to oven uncovered and bake for 15 minutes. The Parmesan cheese should have melted and lightly browned..

  4. Allow to rest about 5 minutes and serve.

Why I love this:

Few single foods can bring as many health contributions to your diet in significant quantities as wild Alaskan salmon.  Salmon is an excellent source of Omega-3 fatty acids which are great for your heart, skin, mood and cognition.  It also a great source of vitamin d, selenium, and the essential amino acids.   This Salmon recipe is one of the easiest go to recipes you could have in your repertoire. The parsley and parm gives this salmon an amazing flavor for very few calories. Simple, easy, delicious and nutritious, and perfect for a quick dinner or date night – serve with your favorite steamed green veggie and whole grain for a delicious meal!

Comment

Co-Founder | Nutritionist

Lisa is the Co-Founder and Nutritionist at Tuesday Foods. Always dressed for action in her workout clothes, Lisa found her calling as a fitness and nutrition expert from her background in the sport of gymnastics – learning early on that how you feel, and how well you perform is directly related to what you eat, and how you move your body every day. A former competitive gymnast and coach, Lisa holds a BS in Exercise Physiology, a MS in Nutritional Science, and is a Certified Nutritionist and Health Coach.

Print Friendly and PDF

Magnesium 101

shutterstock_1028005963.jpg

Magnesium 101: What You Really Need to Know

Magnesium is one of those nutrients we don’t hear about too much, despite the fact that it’s one of the most important minerals for our bodies.

Magnesium is a powerful mineral responsible for over 300 different functions of the body. In fact, every organ in the body needs magnesium. It helps keep your blood pressure normal, your bones strong, your immune system in check, and your heart rhythm steady. It’s kind of a big deal, and a magnesium deficiency can wreak havoc on your body.

So what role does magnesium play?

Let’s find out…

Magnesium helps lower our stress levels. In fact, magnesium is often referred to as the “relaxation mineral.” Serotonin, which is a natural mood stabilizer found mostly in our digestive system, requires magnesium for its production. Therefore, it is recommended that we take magnesium to help manage our stress, anxiety, and mood disorders. In turn, a magnesium deficiency can affect our stress level and emotional state.

Magnesium is used in hospitals and given to patients intravenously who are having heart palpitations – the magnesium helps slow down their heart rate.

Magnesium is necessary for numerous chemical reactions in our body, including making DNA.

Magnesium helps maintain our brain function by relaying signals between our body and our brain. It prevents overstimulation of nerve cells, which could result in brain damage.

Magnesium helps regulate muscle contractions – it opposite to calcium to help our muscles relax. Magnesium is commonly recommended for treating muscle cramps.

Magnesium has also been linked to helping reduce the risk of many diseases, including arthritis, heart disease, and diabetes. Several studies have shown that migraine headaches are associated with low levels of magnesium.

Despite magnesium being abundant in our body, many people don’t get enough of it.

Some studies say that up to 68% of adults don’t get enough magnesium in accordance with the recommended daily intake (RDI).

So how much magnesium should we be consuming on a daily basis to keep our body functioning as it should?

Adult men should consume 420 mg/day, while adult women should consume 320 mg/day.

There could be consequences from consuming too much magnesium or not enough magnesium:

Too much magnesium can cause various symptoms, including diarrhea.

A magnesium deficiency (called hypomagnesemia) could lead to various health conditions, including muscle twitches and cramps, osteoporosis, fatigue, high blood pressure, asthma, heart disease, and diabetes.

Common symptoms of magnesium deficiency are:

  • Muscle spasms and cramps

  • Migraines and headaches

  • Anxiety & depression

  • High blood pressure

  • Hormone problems

  • Sleep issues

  • Low energy

  • Bone loss

And here’s good news! There are plenty of magnesium-rich natural food sources.

  • Pumpkin seeds (check out the recipe below for making Creamy Pumpkin Seed Butter)

  • Raw almonds and cashews (raw nuts are better than roasted nuts – roasted nuts lose magnesium during the roasting process)

  • Artichokes

  • Dark chocolate
    Black beans, peas, and soybeans

  • Green leafy vegetables (spinach)

  • Whole grains (oat bran)

  • Herbs (coriander, chives, dill, sage)

Magnesium can also be absorbed through the skin, so consider using a magnesium oil or lotion that contains magnesium. Or, take an epsom salt bath which is rich in magnesium.

However, the easiest (and yummiest) way of getting in your daily magnesium - is to include plenty of food sources high in this multi-tasking mineral, such as this Creamy Pumpkin Seed Butter!
________________________________________
RECIPE:

Creamy Pumpkin Seed Butter

Ingredients:

  • 2 cups raw pumpkin seeds

  • 1-2 tsp. oil (grapeseed or olive)

Preparation:

1. Preheat oven to 350 degrees.
2. Spread the pumpkin seeds on a baking sheet.
3. Bake for 10-12 minutes, until lightly golden.
4. Cool for 15-20 minutes.
5. Put the pumpkin seeds in a food processor.
6. Run the food processor for approximately 4-5 minutes, until the pumpkin seeds begin to have the texture of butter. If necessary, stop the food processor and scrape the sides.
7. Continue running the food processor for another 2-5 minutes until the pumpkin seeds have the texture of butter. Add some of the oil, as needed, until the desired consistency is obtained.

REFERENCES:

https://www.healthline.com/nutrition/what-does-magnesium-do

http://www.magnesium.ca/

Comment

Co-Founder | Nutritionist

Lisa is the Co-Founder and Nutritionist at Tuesday Foods. Always dressed for action in her workout clothes, Lisa found her calling as a fitness and nutrition expert from her background in the sport of gymnastics – learning early on that how you feel, and how well you perform is directly related to what you eat, and how you move your body every day. A former competitive gymnast and coach, Lisa holds a BS in Exercise Physiology, a MS in Nutritional Science, and is a Certified Nutritionist and Health Coach.

Print Friendly and PDF

The Best Healthy Hot Chocolate

anuja-mary-tilj-8gnJu1Brcpk-unsplash.jpg

This healthy hot chocolate is a delicious alternative to the powdered mixes we used when I was a kid!

The comforting blend of cocoa, almond milk, almond butter, maple syrup, vanilla and coconut oil provide the decadent texture and warming flavors that you’d expect from a cup of hot chocolate.

I love using almond milk in this recipe as its easy flavor blends perfectly with the rich cocoa powder. If you want a creamier and nut-free drink, try using coconut milk instead.

Ingredients:

1 1/2 cups almond milk (or coconut milk)
1 tablespoon maple syrup
1 teaspoon organic coconut oil
2 tablespoons of raw almond butter
1/2 teaspoon of vanilla extract
Pinch of sea salt to taste
1 heaping tablespoon cocoa powder

Directions:

In a milk frother, add all ingredients into the frother container and put the setting on steam/hot to blend together. If you don’t have a milk frother, use a Vitamix or high-speed blender until thick and smooth. Then pour into a small pot and gently heat until warm.

Comment

Co-Founder | Nutritionist

Lisa is the Co-Founder and Nutritionist at Tuesday Foods. Always dressed for action in her workout clothes, Lisa found her calling as a fitness and nutrition expert from her background in the sport of gymnastics – learning early on that how you feel, and how well you perform is directly related to what you eat, and how you move your body every day. A former competitive gymnast and coach, Lisa holds a BS in Exercise Physiology, a MS in Nutritional Science, and is a Certified Nutritionist and Health Coach.

Print Friendly and PDF

Leftover Turkey Soup

shutterstock_175319597.jpg

Thanksgiving leftovers are delicious the first time, but less tempting as the week goes on...Don't you agree? This homemade leftover turkey soup recipe is the perfect way to reinvent the thanksgiving leftovers once they get boring.

Your body will thank you as well for a meal with bone broth and veggies after all the holiday overindulgence!

Lisa’s Leftover Turkey Soup

Makes 4-5 Servings

Ingredients:

1 Tablespoon olive oil
1 small onion (chopped)
2 Tablespoons minced garlic
8 cups vegetable broth
2 bay leaves
½ chopped celery
½ cup diced carrots
Salt and freshly ground black pepper
1/3 cup uncooked long grain white or brown rice (use brown rice if you are on the cleanse)
2 cups diced roasted turkey (leftovers)
¼ cup chopped green onions
3 Tablespoons fresh parsley
2 tablespoons chopped fresh basil
1 ½ cups small diced assorted fresh vegetables (we used zucchini and yellow squash)
2 cups baby spinach leaves
Pinch crushed red pepper (optional)

Instructions:

Add the olive oil and onion to a large saucepan and cook onion until translucent then add in the minced garlic and stir for about 1 minute.
Add the vegetable broth, bay leaves, chopped celery, chopped carrots, and salt and pepper and cook for 15 minutes.
Stir in the rice and cook, stirring occasionally, until tender, about 20 minutes.
Stir in the turkey, green onions, parsley, basil, chopped vegetables, spinach, and crushed red pepper and cook until the vegetables are tender, 5 to 10 minutes longer.
Add more salt or pepper to taste if necessary. Serve hot.


Comment

Co-Founder | Nutritionist

Lisa is the Co-Founder and Nutritionist at Tuesday Foods. Always dressed for action in her workout clothes, Lisa found her calling as a fitness and nutrition expert from her background in the sport of gymnastics – learning early on that how you feel, and how well you perform is directly related to what you eat, and how you move your body every day. A former competitive gymnast and coach, Lisa holds a BS in Exercise Physiology, a MS in Nutritional Science, and is a Certified Nutritionist and Health Coach.

Print Friendly and PDF

Roasted Kale Chips

shutterstock_331680038.jpg

Roasted Kale Chips - Because I am always looking for ways to get teenagers to eat more Kale! I hope you family enjoys these as much as we do.

Roasted Kale Chips

Ingredients:
One 1½-pound bunch kale
1 tablespoon olive oil
1 tablespoon raw pumpkin seeds
¼ teaspoon sea salt
¼ teaspoon freshly ground black pepper

Directions:

Preheat the oven to 350 degrees and set out two baking sheets lined with parchment paper

Rinse the kale and pat dry with paper towels. Wrap the kale in another layer of fresh paper towel—the kale must be very dry in order to crisp up.

Roughly chop the kale leaves and discard the stems.

In a large bowl, toss the kale leaves with the olive oil, pumpkin seeds, salt and pepper, rubbing the leaves with your fingers to coat with the oil and spices. Arrange the leaves over the baking sheets and bake for 7 to 8 minutes. If the chips are crisp in the center, remove them from the oven and serve. Otherwise, bake for an additional 2 to 5 minutes, until the chips have crisped.


Comment

Co-Founder | Nutritionist

Lisa is the Co-Founder and Nutritionist at Tuesday Foods. Always dressed for action in her workout clothes, Lisa found her calling as a fitness and nutrition expert from her background in the sport of gymnastics – learning early on that how you feel, and how well you perform is directly related to what you eat, and how you move your body every day. A former competitive gymnast and coach, Lisa holds a BS in Exercise Physiology, a MS in Nutritional Science, and is a Certified Nutritionist and Health Coach.

Print Friendly and PDF

Quinoa Chicken Stir Fry: A Client Favorite!

chicken-and-broccoli-stir-fry.jpg

A fast, healthy and yummy mid-week meal that everyone in the family can enjoy.……This stir fry requires few ingredients and even less effort!

You can always substitute the chicken for another protein like beef, shrimp, or tofu — so versatile. Your family will be begging for seconds! This recipe calls for serving over quinoa, but you could use brown or jasmine rice, of course!

Ingredients

  • 1 lb Chicken Breast or Thigh (bone on)

  • 1 cup Quinoa

  • 1 1/2 cup Water

  • 2 tbsps Tamari

  • 1 tbsp Raw Honey

  • 1 tbsp Apple Cider Vinegar

  • 4 cups Broccoli (cut into florets)

  • 1 tbsp Coconut Oil

  • 1 Yellow Bell Pepper (diced)

  • ½ Sweet Onion (chopped)

  • 1 tbsp Ginger (grated)

  • 3 Cloves Garlic (minced)

  • 1/2 cup Cashews (or more)

  • 3 Stalks Green Onion (chopped)

  • Sea Salt & Black Pepper (to taste)

  • Fresh Basil for serving

  • lime wedges for serving

Preheat oven to 350ºF . Sprinkle the chicken with salt and pepper. Place on a baking sheet and bake for 30 minutes. Thighs may need 110 more minutes. Once done, remove from oven and dice into pieces or strips.

Meanwhile, add quinoa and water to a medium sized pot. Heat on high until it reaches a boil. Once boiling, cover and reduce to a simmer for 12 to 15 minutes. Once all liquid is absorbed, remove the cooked quinoa from heat, fluff with a fork and set aside.

Combine the tamari, honey and vinegar in a bowl and stir until mixed. Set aside.

Steam broccoli until bright green (5 minutes).

Heat oil in the skillet. Add the yellow pepper and onion and cook while stirring occasionally for 1 minute. Add the ginger, and garlic and cook for another minute. Stir in the broccoli, chicken and tamari mixture. Stir until heated through or until tamari mixture is absorbed.

Serve stir fry over a layer of quinoa and garnish with cashews and green onion. Season with more sea salt and pepper to taste. Serve with torn basil leaves and lime wedges. Enjoy!  

Print Friendly and PDF
Comment

Co-Founder | Nutritionist

Lisa is the Co-Founder and Nutritionist at Tuesday Foods. Always dressed for action in her workout clothes, Lisa found her calling as a fitness and nutrition expert from her background in the sport of gymnastics – learning early on that how you feel, and how well you perform is directly related to what you eat, and how you move your body every day. A former competitive gymnast and coach, Lisa holds a BS in Exercise Physiology, a MS in Nutritional Science, and is a Certified Nutritionist and Health Coach.

Print Friendly and PDF

Apple Pie Pancakes

shutterstock_310851125.jpg

Healthy apple pancakes made with all gluten free ingredients. They taste decadent, but are low in sugar and packed with fiber

Ingredients

  • 3 Eggs

  • 3/4 cup Unsweetened Almond Milk

  • 3 tbsp Maple Syrup (divided)

  • ¾ Lemon (juiced and divided)

  • 1 tsp Vanilla Extract

  • 1/2 cup Coconut Flour

  • 1/2 cup Arrowroot Powder

  • 1 1/2 tsps Baking Powder

  • 1/4 tsp Baking Soda

  • 1/4 tsp Sea Salt

  • 1 tbsp Extra Virgin Olive Oil

  • 1 tbsp Coconut Oil

  • 1 Apple (cored and diced)

  • 1/2 tsp Cinnamon

  • 2 tbsps Almond Flour

Directions:

  1. In a large bowl, whisk the eggs, almond milk, 1/3 of the maple syrup, 1/3 of the lemon juice and vanilla until combined.

  2. In a separate bowl, combine the coconut flour and arrowroot flour. Add to the wet mixture about 1/4 cup at a time, whisking thoroughly.

  3. Mix in baking powder, baking soda, and salt.

  4. Grease a large skillet with olive oil and place over medium heat. Once hot, pour pancakes in the skillet, about 3-inches wide.

  5. Once small holes begin to appear in the surface of the pancake, sprinkle a few apple chunks onto it and flip over. Cook each side approximately 3-4 minutes. Repeat until batter is finished.

  6. Heat coconut oil in a small saucepan over medium heat. Add remaining apple chunks, cinnamon, the remaining 2/3 of the lemon juice and the remaining 2/3 of the maple syrup. Stir until combined.

  7. Add almond flour and turn down to low-medium heat. Let simmer and stir occasionally for 3 to 5 minutes or until apple chunks are soft.

  8. Top apple pancakes with chunky apple cinnamon sauce and enjoy!

Comment

Co-Founder | Nutritionist

Lisa is the Co-Founder and Nutritionist at Tuesday Foods. Always dressed for action in her workout clothes, Lisa found her calling as a fitness and nutrition expert from her background in the sport of gymnastics – learning early on that how you feel, and how well you perform is directly related to what you eat, and how you move your body every day. A former competitive gymnast and coach, Lisa holds a BS in Exercise Physiology, a MS in Nutritional Science, and is a Certified Nutritionist and Health Coach.

Print Friendly and PDF

Autumn Carrot Soup

jade-aucamp-OMcrCX6wDpU-unsplash.jpg

This silky smooth, super versatile vegetarian soup is perfect for a dinner party starter, everyday fall dinner or warming lunch!

Autumn Carrot Soup

  • 2 tbsps EVOO or butter

  • 1 Medium Yellow Onion (chopped)

  • 1 1/2 tsp Curry Powder

  • 1 Cup Carrots (peeled and chopped)

  • 1 Cup Sweet Potatoes (peeled and chopped)

  • 4 Cups Chicken Broth (or veg broth)

  • 1/2 tsp Salt

  • 1 Apple ( I like Honeycrisp or Fuji, peeled and chopped)

  • 1 tbsp Honey

  • 1/8 tsp Freshly Ground Black Pepper (to taste)

  • For Garnish: Toasted Pumpkin Seeds and red chili flakes

1. In a large pot, melt the butter over medium heat. Add the onions and cook, stirring frequently, until soft and translucent, about 10 minutes. Do not brown.

2. Add the curry powder and cook a minute more.

3. Add the carrots, sweet potatoes, chicken broth and salt and bring to a boil.

4. Cover and simmer over low heat until vegetables are very tender, about 25 minutes. Stir in the apples and honey. Using a stick blender, puree the soup until smooth and creamy. (Or let cool slightly, and blend in a blender)

5. Season to taste with salt, pepper and more honey if necessary.

6. Ladle soup into bowls and sprinkle with toasted pumpkin seeds and red chili flakes if desired

(Note: As the soup sits, it will thicken up so you may need to add a bit of water to thin it out.)

Print Friendly and PDF
Comment

Co-Founder | Nutritionist

Lisa is the Co-Founder and Nutritionist at Tuesday Foods. Always dressed for action in her workout clothes, Lisa found her calling as a fitness and nutrition expert from her background in the sport of gymnastics – learning early on that how you feel, and how well you perform is directly related to what you eat, and how you move your body every day. A former competitive gymnast and coach, Lisa holds a BS in Exercise Physiology, a MS in Nutritional Science, and is a Certified Nutritionist and Health Coach.

Print Friendly and PDF

What Your Hair, Skin & Nails Say About Your Health

joelvalve-bMdGjY9h8jo-unsplash.jpg

Hair, Skin, & Nails – What They Say About Your Health

Your physical appearance can tell you a lot about your internal health.

Most natural health practitioners include a physical examination since the condition of your hair, skin, and nails can be indicators of underlying health issues, like nutrient deficiencies, hormonal imbalances, and the health of your digestive system.

The growth and maintenance of healthy hair, skin, and nails is dependent on your intake, and absorption of a variety of nutrients, including plenty of vitamins and minerals.

You should regularly check out the appearance and condition of your hair, skin, and nails for clues as to what foods, and therefore what nutrients your diet may be lacking.

Physical signs that you may be lacking something in your diet

FINGERNAILS & TOENAILS

Healthy nails are clear, smooth, and flexible. Like hair, healthy nails should be in a continuous cycle of re-growth.

The following color or texture changes in your nails are common signs of nutrient deficiencies:

WHITE SPOTS – If you notice white spots on your nails, you may not be getting enough zinc in your diet.

Good sources of zinc include:

●      pumpkin seeds

●      dark chocolate

●      Seafood

●      red meat

●      leafy green vegetables

HORIZONTAL RIDGES along your nails may indicate either a zinc or iron deficiency.

Good sources of iron include:

●      Red meat

●      Beans & legumes

●      Leafy green vegetables

●      Dried fruit

To enhance your body’s absorption of iron, pair iron-rich foods with a good source of vitamin C, like citrus fruits, strawberries, or bell peppers.

SKIN

Did you know that the health of your skin is closely tied to the health of your gut and liver function?

These two rather essential organs (your skin & liver) are processing and detoxifying everything – including foods, drinks, supplements, and medicines - pretty much everything you take in from the outside world.

Inflammatory skin conditions, like acne, eczema, and skin rashes are common symptoms of leaky gut syndrome – when the walls of the small intestine become thin and too permeable or “leaky”.

Breakouts and rashes can also be symptoms of a sluggish liver. Your liver’s primary responsibility is detoxification. So a poor diet, medication, and excessive alcohol intake can result in a slow, congested liver that is less efficient at doing its job.

Inflammatory skin conditions can also result from food intolerance and/or allergies. Many people have intolerances to gluten and dairy products. Additionally, excessive intake of sugar and refined carbohydrates can also disrupt normal gut function that often results in skin irritations.

Dry or flaky skin can signal a lack of healthy Omega-3 fats in the diet.

Avoiding foods you are intolerant to, adding in more Omega-3-rich foods, and supplementing with probiotics, plus a high quality fish oil may benefit your skin.

HAIR

Healthy hair is soft, elastic, and should also be in a continuous cycle of re-growth. Hair should NOT easily break or fall out.

While no one wants to deal with premature hair loss, that’s exactly what can happen if your diet is lacking certain nutrients and/or you have an undetected health issue.

If you are noticing you’re shedding a few hairs each day though -- RELAX! That’s totally normal as hair follicles move through their growth cycle.

However, excessive shedding that results in noticeable hair thinning and/or changes in hair texture, like dryness or brittleness, can result from:

→ Thyroid hormone imbalance, resulting in hypo or hyperthyroidism

-       Have blood levels checked regularly

 → Not enough protein – the main building block of new hair growth

-       Include a good source of protein, such as meat, poultry, seafood, eggs, beans, or nuts, with each meal to meet your daily requirements

→ Not enough omega-3’s – healthy fats help keep hair and scalp conditioned with the production of natural oils

-       Consider taking a fish oil supplement and frequently include good sources of Omega-3’s, like walnuts, chia seeds, and fatty fish, in your diet

→ Lacking vitamins & minerals

-       Iron

-       Zinc

-       B vitamins


A DIY Trail Mix is an easy way to combine essential nutrients that help promote healthy hair, skin, and nails. Raw nuts and seeds are good sources of Omega-3 fats, as well as key minerals like zinc.

Natural sweet-makers like dark chocolate and raisins are good sources of iron and punch up the flavor & fun of your mix too. Be creative, incorporate more whole and snackable foods into your diet and get to mixing - for your hair, skin & nails’ sake!

RECIPE:

Healthy Skin, Hair & Nails Trail Mix

Ingredients

1 cup raw walnuts

1 cup raw almonds

½ cup raisins

¼ cup raw pumpkin seeds (pepitas)

¼ cup dark chocolate chips

To prepare 

Combine all ingredients in a medium bowl, then transfer to airtight container and store at room temperature or in refrigerator.

A serving size is ¼ cup trail mix.

REFERENCES:

Healthline: 9 Tricks for Healthier, Fuller-Looking Hair

CanPrev Blog: What Do My Fingernails Have To Do With My Health?

Study: Frontiers in Microbiology, 2018 - The Gut Microbiome as a Major Regulator of the Gut-Skin Axis

Comment

Co-Founder | Nutritionist

Lisa is the Co-Founder and Nutritionist at Tuesday Foods. Always dressed for action in her workout clothes, Lisa found her calling as a fitness and nutrition expert from her background in the sport of gymnastics – learning early on that how you feel, and how well you perform is directly related to what you eat, and how you move your body every day. A former competitive gymnast and coach, Lisa holds a BS in Exercise Physiology, a MS in Nutritional Science, and is a Certified Nutritionist and Health Coach.

Print Friendly and PDF

Tuscan White Bean Soup

IMG_3038.jpg

This Tuscan white bean soup recipe is outstanding for a few different reasons: it is flavorful, creamy, delicious and so comforting. Even your kids will eat this delightful vegan soup!

Tuscan White Bean Soup

Ingredients

  • 1 cup carrots, diced

  • 1 cup onion, diced

  • 1 cup celery, diced

  • Olive oil

  • 1 tbsp fresh rosemary 

  • 2 large cloves garlic

  • 2 15.5 oz cans cannellini beans drained

  • Parmesan rind* (optional, leave out for vegan soup)

  • 2 cups loosely packed kale

  • 5 cups vegetable broth

  • Salt 

  • Pepper

Instructions:

Heat a large sauce pan on medium heat and add enough Olive oil to coat the bottom of the pan.

When oil is hot add diced onion, celery and carrots. Reduce heat slightly and cook until fragrant, then add rosemary. When rosemary begins to darken slightly add garlic and turn heat down as to not over sauté garlic.

Add vegetable broth and bring heat back up to medium/medium high. Add 1 can of cannellini beans. If using Parmesan rind, add now. Allow soup to heat up (about 10 minutes). Pour 2 ladles of soup into a blender with remaining can of beans. Blend until smooth and then add the blended mixture back into the soup. This will make the soup nice and creamy!

Remove parmesan rind and add kale. Add salt and pepper to taste.

When kale is cooked through, the soup is ready to serve! Serve with a nice piece of crusty bread.

Enjoy!

Print Friendly and PDF
1 Comment

Co-Founder | Nutritionist

Lisa is the Co-Founder and Nutritionist at Tuesday Foods. Always dressed for action in her workout clothes, Lisa found her calling as a fitness and nutrition expert from her background in the sport of gymnastics – learning early on that how you feel, and how well you perform is directly related to what you eat, and how you move your body every day. A former competitive gymnast and coach, Lisa holds a BS in Exercise Physiology, a MS in Nutritional Science, and is a Certified Nutritionist and Health Coach.

Print Friendly and PDF

HIIT: What is it?

element5-digital-7QYd1VxLRbM-unsplash.jpg

And is it really the best fat burning workout?

If you follow the fitness industry, you’ve probably heard of the benefits of HIIT (or High Intensity Interval Training).

The short, yet powerful workouts are touted as the best way to improve your overall conditioning, burn fat, and even balance hormones! (but that’s another article!)

So, what is HIIT anyway?

HIIT workouts involve working at an intense effort level for a short period of time followed by short recovery periods.

Tabata workouts are one great example of a HIIT style workout.

A Tabata session involves 20 seconds of intense all-out effort, followed by 10 seconds of recovery. This is repeated 8 times through for a workout total of 4 minutes only and is said to promote fat loss and increase aerobic power - all in a very short period of time.

Seems a little too good to be true...

But, is HIIT really all it’s cracked up to be? And does it actually burn fat or is that just a myth?

When it comes to the research, the answer is YES!

One study compared MICT (Moderate Intensity Continuous Training) vs. HIIT and the effects that it had on visceral abdominal fat. The study found that both types of training reduced overall body fat; however HIIT did this in half the time. Half the time!! [1]

Another study from the International Journal of Obesity compared 2 groups of exercisers to determine the benefits of HIIT for women. [2

The women were divided into two groups: the first group did 40 minutes of steady state aerobic exercise for 15 weeks. The second group did 8 second sprints followed by 12 seconds of recovery for 20 minutes.

The results of the HIIT study?

HIIT participants lost up to 7.3lbs and the steady state exercisers gained up to 2.7lbs. HIIT participants also saw significant reduction in overall body fat as well as subcutaneous abdominal fat - the is the fat just beneath your skin.

Other key benefits of HIIT

●      Reduces fasting insulin levels and decreases risk for Type 2 Diabetes and heart disease

●      It significantly improves your cardiovascular fitness. The International Journal of Obesity Study also found that HIIT participants improved their VO2 max (aerobic power) by up to 23% [2]

●      It balances your hormones! Research shows that high intensity exercise boosts Human Growth Hormone (HGH), which is a powerful anti-aging hormone that helps us maintain lean muscle mass (think revved up metabolism!) AND bone density, which reduces risk of osteoporosis. [3]

●      It’s easy to fit into a busy lifestyle since it doesn’t take a lot of time.

●      They’re portable. You can get an effective HIIT workout using minimal or no equipment whatsoever which makes it great for staying in shape while you’re on the road.

How often should you do HIIT workouts to achieve these results?

HIIT workouts do have a lot of benefits, and it has been documented that they only need to be done 2-3 times a week.

But, because they require such a high level of effort, they can put more strain on your joints, thus increasing your risk of injury if done too frequently.

This 15-minute bodyweight HIIT workout “recipe” is a great way to burn fat and stay fit when you’re tight for time and space.

The Workout “Recipe”:

1)    Jump Squats (beginners can do a regular bodyweight squat without the jump)

2)    Push-ups (beginners can start from their knees)

3)    Jumping Jacks

4)    Burpees

How to perform

Beginners: Do 30 seconds of each exercise followed by 30 seconds of rest. If needed, modify the jump squat to a basic body weight squat (no jump). Pushups can also be modified by performing from knees rather than toes.

Once you’ve completed all 4 exercises, rest for 1-2 minutes.  Repeat for 2-3 sets total.

Intermediate:  Do 40 seconds of each exercise followed by 20 seconds of rest. Once you’ve completed all 4 exercises, rest for 1 minute to 90 seconds. Then repeat for 3 sets total.

Advanced: Do 50 seconds of each exercise followed by 10 seconds of rest. Once you’ve completed all 4 exercises, rest for 1 minute and repeat for 3 sets total.

REFERENCES

[1] https://www.ncbi.nlm.nih.gov/pmc/articles/PMC5237463/

[2] https://www.nature.com/articles/0803781

[3] https://www.ncbi.nlm.nih.gov/pubmed/12797841

Comment

Co-Founder | Nutritionist

Lisa is the Co-Founder and Nutritionist at Tuesday Foods. Always dressed for action in her workout clothes, Lisa found her calling as a fitness and nutrition expert from her background in the sport of gymnastics – learning early on that how you feel, and how well you perform is directly related to what you eat, and how you move your body every day. A former competitive gymnast and coach, Lisa holds a BS in Exercise Physiology, a MS in Nutritional Science, and is a Certified Nutritionist and Health Coach.

Print Friendly and PDF

Chocolate Banana Bread Muffins

shutterstock_1062210266.jpg

These banana muffins are a yummy, healthy snack or they make a great grab-and -go breakfast on busy mornings. These delicious treats are dairy-free, gluten-free, naturally sweetened, and full of yummy banana flavor.

INGREDIENTS

Wet ingredients:
¼ cup extra virgin olive oil (or any neutrally flavored oil)
¼ cup maple syrup
3 eggs
1 cup mashed ripe bananas (about 2 medium bananas)
1 tablespoon pure vanilla extract

1 teaspoon apple cider vinegar

Dry ingredients:
¾ teaspoon sea salt
¾ teaspoon baking soda
3 cups almond flour
½ cup cacao powder or unsweetened coco powder
2 tablespoons ground flax seeds
1/2 cup mini dark chocolate chips

INSTRUCTIONS

Preheat the oven to 350 F. Line a muffin tin with paper liners. (Makes about 36 mini muffins or 12 regular sized muffins)

Combine the wet ingredients in a food processor until well mixed, about 30 seconds. (You can also mix and by hand.)

Now, combine the dry ingredients, minus the chocolate chips, in a mixing bowl.

Add the dry ingredients to the wet ingredients and pulse 3-4 times (or stir) to create the batter. Don’t over mix the batter.

Unplug the food processor, remove the blade, then gently fold in the chocolate chips.

Add 1 tablespoon of the batter to each mini muffin cup or use 3 tablespoons if using regular size muffin cups.

Bake for 15-20 minutes until the muffins are cooked through. Use a toothpick through the middle of a muffin at 15 minutes to test for “doneness”. The toothpick should come out clean.

Let the muffins cool completely to allow them to set.

Print Friendly and PDF
Comment

Co-Founder | Nutritionist

Lisa is the Co-Founder and Nutritionist at Tuesday Foods. Always dressed for action in her workout clothes, Lisa found her calling as a fitness and nutrition expert from her background in the sport of gymnastics – learning early on that how you feel, and how well you perform is directly related to what you eat, and how you move your body every day. A former competitive gymnast and coach, Lisa holds a BS in Exercise Physiology, a MS in Nutritional Science, and is a Certified Nutritionist and Health Coach.

Print Friendly and PDF

What The Heck Is A Leaky Gut

joanna-kosinska-m741tj4Cz7M-unsplash.jpg

How in The Heck Can My Gut Be Leaking?!


There’s A LOT of talk in the health world about gut health these days. You’ve probably even heard that the key to reversing a whole host of health issues, ranging from skin issues to serious autoimmune conditions, starts with healing your so-called leaky gut.

Afterall, Hippocrates is famously credited with stating that “all disease begins in the gut”.

Several factors are thought to disrupt the normal intestinal environment and contribute to a leaking gut.


But what the heck is a “leaky gut” – and how do I know if mine is leaking?


This refers to damage and/or thinning of the lining of the small intestine (aka, your gut). Your small intestine acts as the barrier between the outside world and the rest of your body – a pretty important job!

The small intestine is also where partially digested food from the stomach (and anything else you take in from the outside world, like medications and supplements) is further broken down and absorbed into the bloodstream, where it is then carried for use throughout the rest of the body.

If your intestinal wall is damaged, thinned, or has gaps in it – known as impaired intestinal permeability, the breakdown and absorption of the food you eat is also impaired.

Partially digested compounds, bacteria, and chemicals that shouldn’t be absorbed can quite literally “leak” across the intestinal membrane and into your bloodstream.

The immune system then kicks into action, reacting to these foreign substances that have crossed the intestine as dangerous intruders.


It is believed that this immune response (from leaky gut) may be the underlying cause of other diseases, like:

● Systemic inflammation
● Irritable bowel syndrome (IBS)
● Food allergies and intolerances
● Nutrient deficiencies
● Celiac disease
● Diabetes
● Autoimmune disorders
● Mood disorders
● Skin conditions like eczema

Several factors are thought to disrupt the normal intestinal environment and contribute to a leaking gut.
Contributors to leaky gut include:


● Excessive intake of calories, unhealthy fats, refined grains, sugars, and alcohol, which promote inflammation and digestive trouble.
● The use of antibiotics and NSAIDs (i.e. ibuprofen). These can disrupt the balance of good and bad bacteria in the gut and cause damage to the lining of the gastrointestinal system, respectively, if used frequently.
● Disturbances in the gut microbiome. Overgrowth of bad bacteria in the small intestine in relation to the good, healthy bacteria (your gut flora) that help digest your food.
● Chronic stress, which can also cause inflammation throughout the body, including your gut.

Most healthcare professionals don’t recognize leaky gut as an official diagnosis, and there isn’t a standard test to determine if you are suffering from it.

Whether the claims about leaky gut are scientifically proven or not, we do know that gut health is something to consider when it comes to your overall health.

If you’re experiencing digestive woes, like bloating and irregularity, it’s possible your gut health and digestion may be impaired and that your gut is, in fact, in need of healing.


Good habits to support a healthy intestinal environment and properly functioning gut include:


● Eat whole, minimally processed foods with a focus on fiber-rich plant foods.
● Include fermented foods, like raw sauerkraut or kimchi, naturally cultured yogurt & kefir (unsweetened), or kombucha, which contain good-for-your-gut bacteria.
● Sip bone broth or take a collagen supplement. Collagen is thought to help rebuild and restore the gut lining.
● Take an omega-3 supplement or include 2-3 servings of fatty fish each week to help combat inflammation.
● Take a daily probiotic supplement to support your gut microbiome.
● Find natural alternatives to pain relief, like essential oils or meditation, instead of relying on over-the-counter NSAID’s which are known to damage the lining of the gut and cause digestive issues.

________________________________________

REFERENCES

Journal of Allergy and Clinical Immunology 2009: Intestinal Barrier Function: Molecular Regulation and Disease Pathogenesis

BMC Gastroenterology 2014: Intestinal Permeability - A New Target For Disease Prevention & Therapy

Is Leaky Gut Syndrome a Real Condition? (An Unbiased Look)

RECIPE
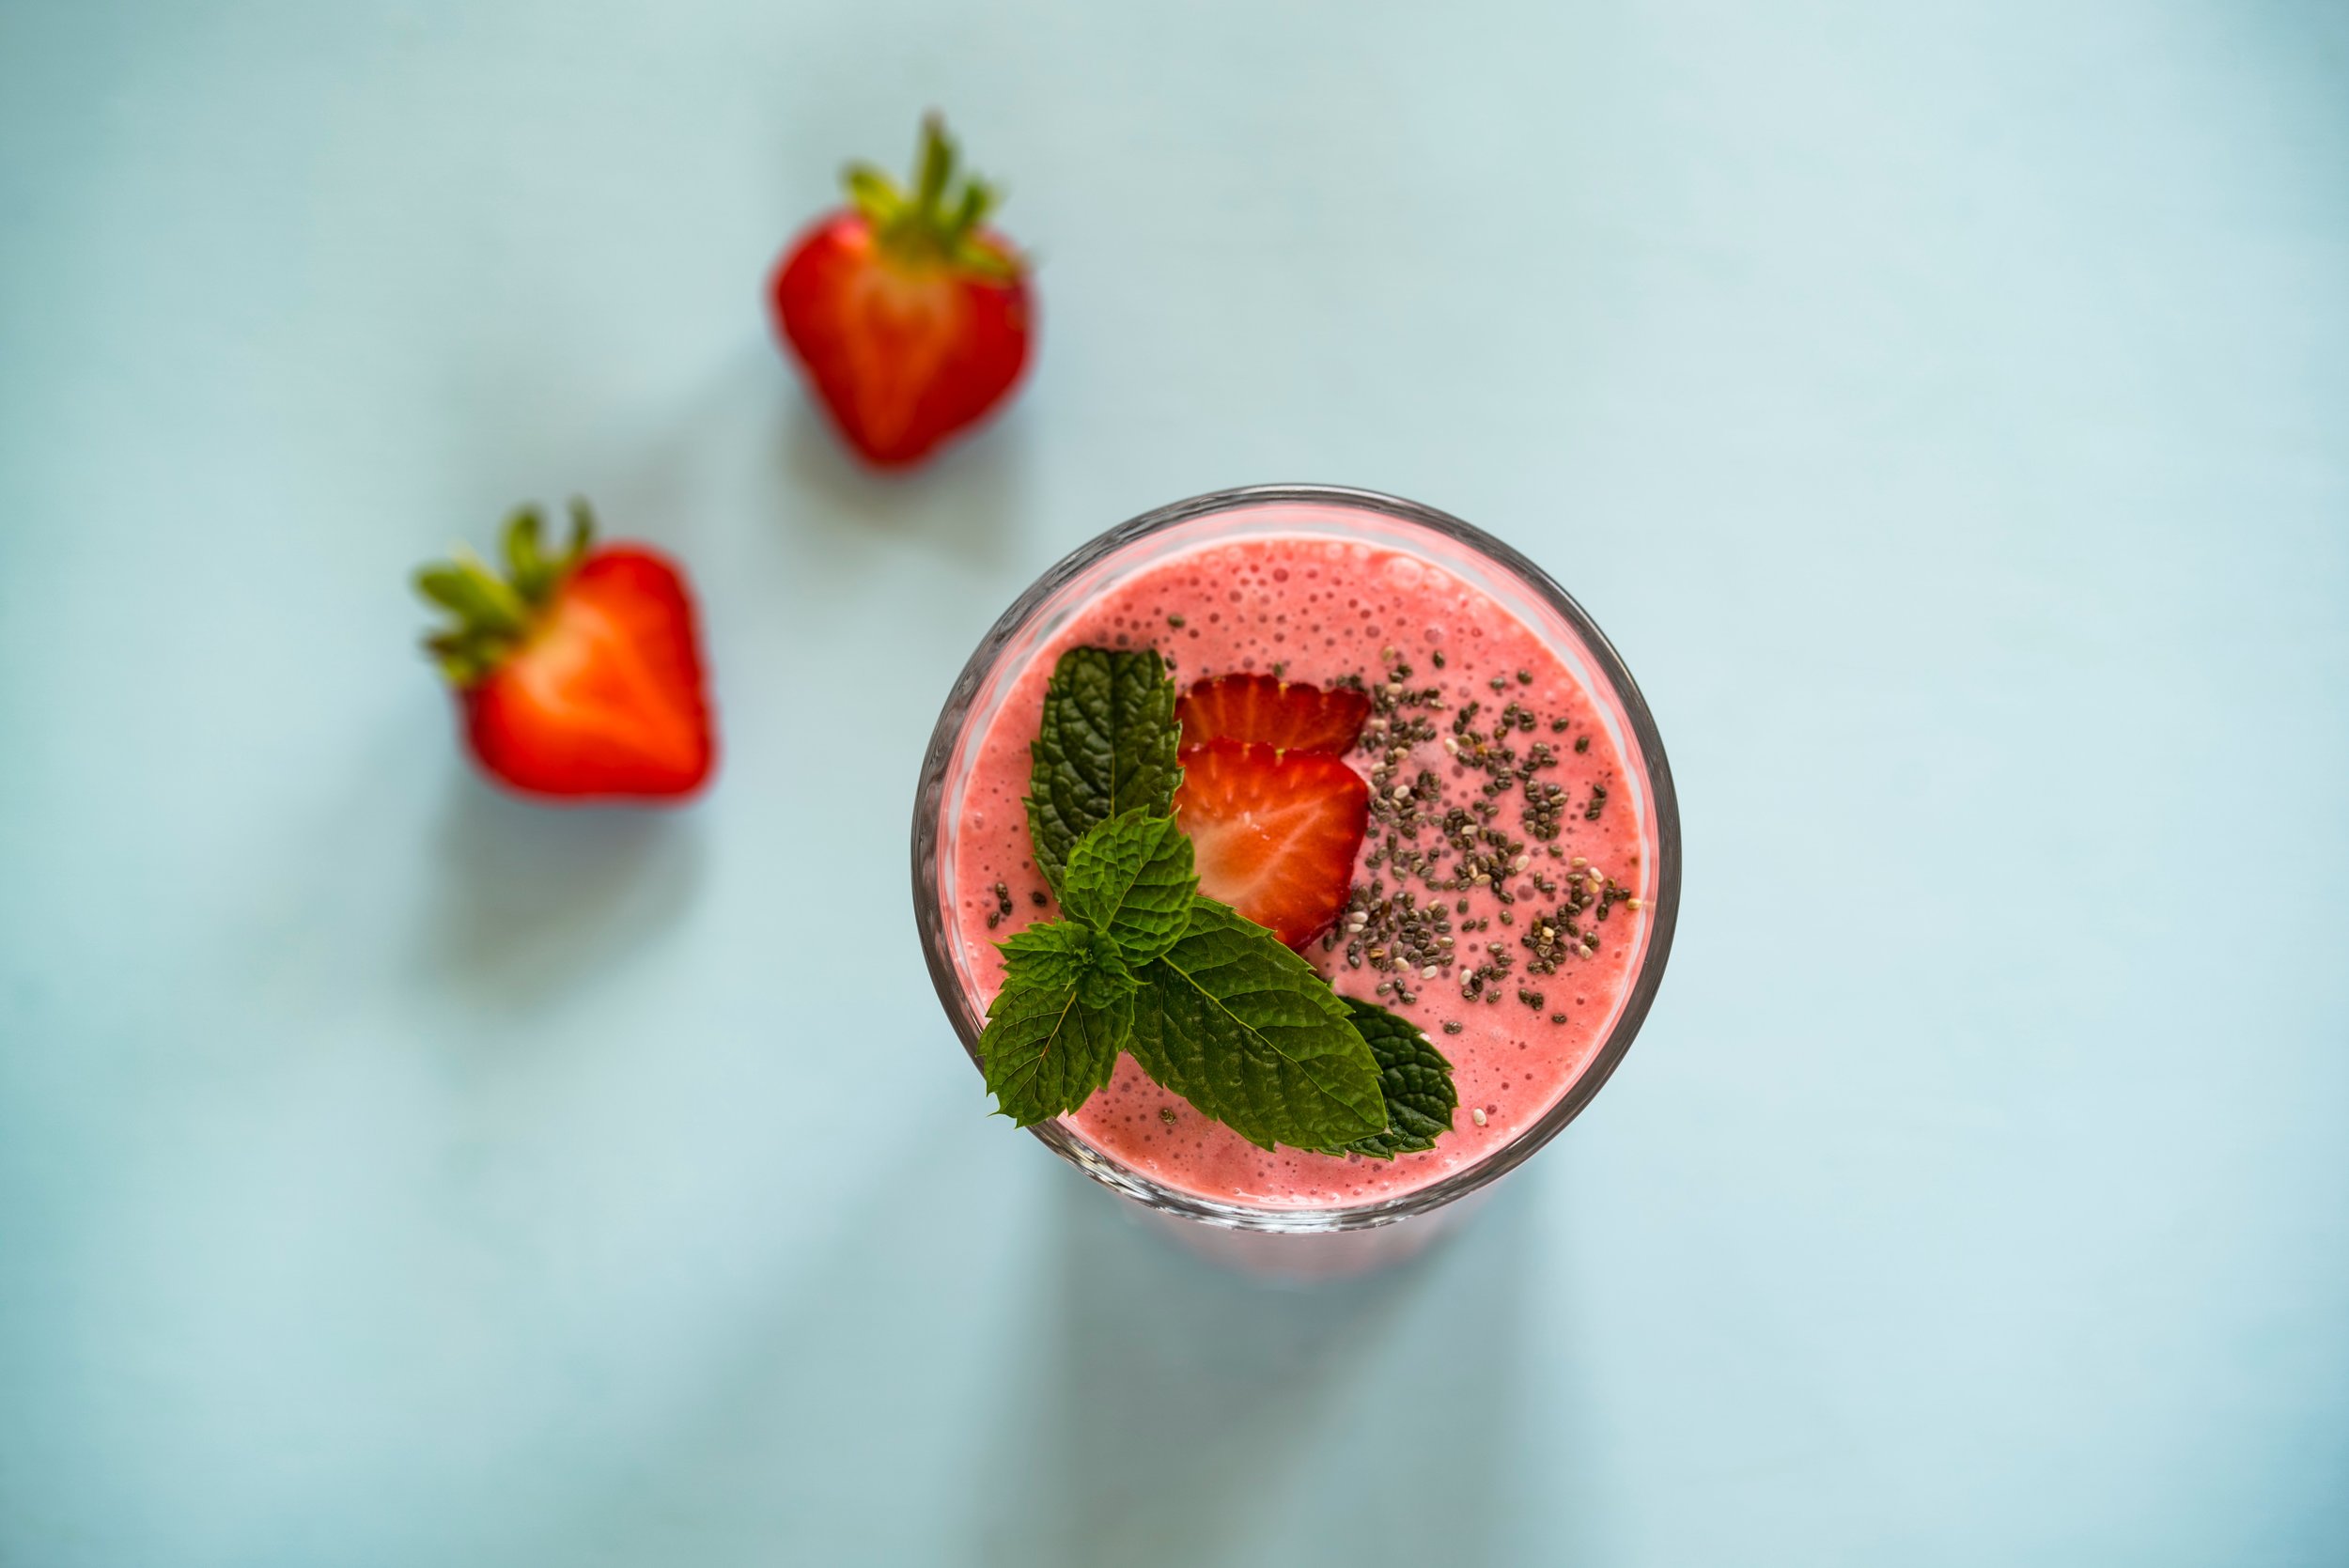
Gut Soothing Banana Berry Smoothie

Ingredients

- 1 cup unsweetened non-dairy milk
- ½ cup kefir (or plain, unsweetened whole milk, naturally cultured yogurt)
- 1 banana
- 1 cup berries, any kind
- 1 Tbsp chia seeds or ground flax
- 1 scoop collagen powder

Preparation

1. Place all ingredients in blender and blend until desired consistency reached.
2. Blend in a few ice cubes if you prefer a cold, frosty smoothie OR use frozen fruit.

Comment

Co-Founder | Nutritionist

Lisa is the Co-Founder and Nutritionist at Tuesday Foods. Always dressed for action in her workout clothes, Lisa found her calling as a fitness and nutrition expert from her background in the sport of gymnastics – learning early on that how you feel, and how well you perform is directly related to what you eat, and how you move your body every day. A former competitive gymnast and coach, Lisa holds a BS in Exercise Physiology, a MS in Nutritional Science, and is a Certified Nutritionist and Health Coach.

Print Friendly and PDF

Oven Roasted Sesame Salmon and Broccoli

Untitled%2Bdesign.jpg
Print Friendly and PDF

Looking to incorporate more fish into your diet? Salmon is an excellent source of omega-3 fatty acids which lower inflammation and are amazing for brain health, heart health… overall health!

Oven Roasted Sesame Salmon and Broccoli


Serves 4

4 salmon fillets
4 cups broccoli florets
1 large onion, chopped
2 tablespoons olive oil
sea salt and black pepper to taste
½ cup sunflower seeds
¼ cup apple cider vinegar
1 garlic clove
½ inch piece of fresh ginger
1 small carrot, chopped
2 teaspoons sesame oil
2 scallions, chopped
2 teaspoons tamari
1 tablespoon honey
4 cups cooked pasta (any shape) or brown rice

PREHEAT OVEN. Preheat the oven to 400 degrees.

ROAST SALMON, BROCCOLI, AND ONION. Massage salmon, broccoli florets, and onion with olive oil, sea salt, and black pepper. Lay mixture onto a baking sheet lined with parchment paper and bake for about 20 minutes until the edges are golden brown. Remove from the oven and set aside to cool.

BLEND DRESSING. Add sunflower seeds, apple cider vinegar, garlic, ginger, carrot, sesame oil, scallions, tamari, and honey to a high-speed blender. Blend until smooth. Add water, if needed to thin out the dressing to your liking.

ASSEMBLE MEAL. Place cooked pasta or brown rice into a large serving bowl. Pour the blended dressing over the top and mix well. Serve topped with roasted salmon, broccoli, and onion.

Comment

Co-Founder | Nutritionist

Lisa is the Co-Founder and Nutritionist at Tuesday Foods. Always dressed for action in her workout clothes, Lisa found her calling as a fitness and nutrition expert from her background in the sport of gymnastics – learning early on that how you feel, and how well you perform is directly related to what you eat, and how you move your body every day. A former competitive gymnast and coach, Lisa holds a BS in Exercise Physiology, a MS in Nutritional Science, and is a Certified Nutritionist and Health Coach.

Print Friendly and PDF