Chef Ottolenghi's Marinated Rack Of Lamb With Cilantro & Honey

shutterstock_259774196.jpg

Spring is here! The days are getting longer, the weather is warmer, and everyone seems to be in a good mood!

With Passover and Easter coming up, you may be planning your menu for get-togethers with family or friends. If so, I'm sharing this recipe from Chef Ottolenghi's "The Cookbook" with you in mind!

This Marinated Lamb With Cilantro And Honey is the perfect entree for your holiday dinner. A delicious, flavorful Mediterannean dish that I loved instantly. And your family will love it too, trust me

Why I Love This: Lamb is a nutrient-dense meat; it’s a great source of protein, healthy fats, and iron. It’s also rich in essential B vitamins like B12 and B6, which promote a healthy nervous system, and zinc, which supports a healthy immune response.

Print Friendly and PDF

Marinated Rack Of Lamb With Cilantro & Honey

Yield: 4-6 Servings

  • 2 ¼ lbs Rack Of Lamb (1 kilogram).

  • ⅓ Cup Parsley (20 grams)

  • ½ Cup Mint leaves (30 grams)

  • ⅓ Cup Coriander leaves (cilantro) (30 grams)

  • 4 Garlic Cloves

  • 2 Tablespoons Ginger Root (15 grams)

  • ½ teaspoon of Salt

  • 3 Tablespoons Lemon Juice (50 grams)

  • ¼ Cup Soy Sauce (60 grams)

  • 3 Chiles (seeded. I used Serrano)

  • ½ Cup Vegetable oil (120 grams)

  • 3 tablespoons of Honey

  • 2 tablespoons of Red Wine Vinegar

  • 4 tablespoons of Water

The marinade is super easy to make. Marinate overnight.

  1. Make sure most of the fat is trimmed off the lamb, leaving a uniform thin layer that will keep the meat moist and add to the flavor

  2. Use a very sharp knife to separate the rack into portions of two or three cutlets.

  3. Blitz together all the remaining ingredients in a food processor and then pour over the lamb and making sure every piece is well covered.

  4. Place in a non-metal container or Ziploc bag and refrigerate overnight.

  5. Preheat the oven to 400. Heat up a heavy cast-iron pan, preferably a ridged grill pan. Remove the meat from the marinade and shake off the excess. Sear well on all sides, about 5 minutes total. Transfer to a baking sheet and cook in the oven for about 15 minutes.

    Meanwhile, heat the marinade in a small saucepan and simmer for 5 minutes. Put the chops on serving plates and serve the sauce in a separate bowl. Both the chops and the sauce can be served hot or at room temperature.

Comment

Co-Founder | Nutritionist

Lisa is the Co-Founder and Nutritionist at Tuesday Foods. Always dressed for action in her workout clothes, Lisa found her calling as a fitness and nutrition expert from her background in the sport of gymnastics – learning early on that how you feel, and how well you perform is directly related to what you eat, and how you move your body every day. A former competitive gymnast and coach, Lisa holds a BS in Exercise Physiology, a MS in Nutritional Science, and is a Certified Nutritionist and Health Coach.

Print Friendly and PDF

Thinking Of Going Dairy Free? Here Are My Go-To Substitutes

shutterstock_1345911449.jpg

If you're reading this, you likely are or are considering going dairy-free. You may have an intolerance, have been told to eliminate dairy, or just want to have less of it.

Either way, dairy is not an essential nutrient, and there are lots of things you can have instead.

These include not just milk, but also yogurt, butter, parmesan, and even pudding and ice cream!

Dairy-free products are becoming more and more popular. Nowadays you can easily find them in the grocery store. But read your labels! Some contain way too much sugar, or other ingredients you may not want to eat or drink.

I've put together some simple recipes to make delicious dairy-free foods right in your kitchen.

Delicious dairy-free milk

There are a number of milk alternatives out there, including almond, soy, coconut, rice, hemp, cashew, and flax milks.

Dairy-free milk is actually so easy to make and flavor yourself. You can make milk out of just about any nut or seed. You can even make alternative milk out of grains like rice, oats, or quinoa. And you can flavor them too.

It just takes a high-powered blender, some water, and cheesecloth to filter out any remaining bits.

For flavoring, you can add a pinch of cinnamon, cardamom, or vanilla extract. You can also sweeten your milk with soaked dates, maple syrup, or honey.

See my 3 favorite nutmilk recipes below!

If you want to make a dairy-free cream, just blend your nuts, seeds and/or grains with 1 cup of water instead of 2 for a thicker, creamier, dairy-free milk. Another recipe below!

Delicious dairy-free yogurt

Soy yogurt is probably the most common dairy-free store-bought yogurt available, followed by coconut.

Technically, with the right yogurt starter probiotic culture, you can make yogurt out of any dairy-free milk. The most common one to ferment into yogurt is coconut milk. But you can use almond milk or other nut or seed milk.

The trick here is with the fermentation. Follow the instructions on the label of the yogurt starter culture, and enjoy delicious dairy-free yogurt in a few days.

Delicious dairy-free butter alternatives

Nut and seed butter is a fabulous substitute for dairy butter. Plus, they have the bonus of fibre, protein, and other nutrients that real butter doesn't have.

Have you tried coconut oil? It’s a great dairy-free substitute for butter. You can fry with it, or even bake with it. You can even use it to pop popping corn in a pot on your stove.

I love the mild flavor of coconut oil in anything I bake with bananas. It tastes better than butter anyway.

Delicious dairy-free parmesan

If you haven’t tried nutritional yeast, you will be pleasantly surprised at how much it tastes like grated parmesan. Plus, it contains some B vitamins as well.

It’s a salty, cheesy, flaky powder that you can use wherever you want to add a pop of savoury flavour to any dish.

TIP: After you've popped your popcorn, sprinkle it with a bit of nutritional yeast for a salty, cheesy flavor.

Delicious dairy-free puddings

Did you know you can make a delicious and thick pudding without dairy? That's right; the plant kingdom has some natural thickeners that are full of fiber.

You can make a chocolate pudding with avocado. Take one whole avocado and blend it up with ¼ cup cocoa powder, ¼ cup dairy-free milk, 1 tsp vanilla extract, and honey or maple syrup to taste. Then add dairy-free milk to thin if desired.

For chocolate chia pudding, use ⅓ cup chia seeds and place in food processor with 1.5 cups dairy-free milk. Wait for 5-10 minutes until the seeds soak up the liquid. Then add ¼ cup cocoa powder, tsp vanilla extract, and honey or maple syrup to taste. Blend into a smooth pudding.

Delicious dairy-free ice cream

N’ice cream is another delicious dessert made with frozen bananas. I’ve included the recipe for this below.

Conclusion

Dairy-free is easy! Making delicious dairy-free yogurt, milk, butter, parmesan flavour, and even pudding and ice cream is simple.

Are you going to try any of these recipes? Do you have a great one to share as well?

Let me know in the comments below.

Chocolate Almond N'ice Cream

Serves 2

  • 2 bananas, chopped and frozen

  • 1 tbsp cocoa powder, unsweetened

  • 2 tbsp almond butter, unsweetened

    Instructions

1 - Add chopped frozen bananas to a food processor. Pulse or lightly blend until almost smooth.

2 - Add cocoa powder and nut butter. Pulse or lightly blend until mixed.

Serve immediately & enjoy!

Tip: Try different nut and/or seed butter. Or instead of cocoa powder and/or seed butter, use just the bananas with a ½ cup of frozen berries. The recipe combinations are endless.

Homemade Hemp Milk

Yield: 3 cups

Ingredients:

  • 1 cup hemp seeds

  • 3 cups filtered water

  • Pinch of sea salt

  • 1 or 2 dates, pitted (optional)

  • 1 tsp. vanilla extract (optional)

Instructions:
In a high speed blender, blend hemp seeds, filtered water, salt, dates, and vanilla (if using) until smooth and creamy. Store in the refrigerator for up to 5 days.

Homemade Brazil Nut Milk

Yield: 4 cups

Ingredients:

  • 2 cups brazil nuts, soaked overnight, then drained

  • 4 cups filtered water

  • Pinch of sea salt

  • 2 tsp. vanilla extract (optional)

Instructions:
In a high speed blender, blend soaked brazil nuts and filtered water on high for about 2 minutes. Strain brazil nut milk through a nut milk bag. Rinse the blender pitcher, and pour in brazil nut milk. Add sea salt, vanilla extract, and blend to combine. Store in a large glass jar in the refrigerator for up to 5 days.

Homemade Almond Milk

Yield: 4 cups

Ingredients:

  • 1 cup raw almonds, soaked in water overnight

  • 4 cups filtered water

  • Pinch of sea salt

  • 2 or 3 dates, pitted (optional)

  • 2 tsp. vanilla extract (optional)

    Instructions:
    In a high speed blender, blend almonds and filtered water on high for about 2 minutes. Strain almond milk through a nut milk bag. Rinse the blender pitcher, and pour in strained almond milk. Add sea salt, dates, and vanilla extract (if using), and blend to combine. Store in a large glass jar in the refrigerator for up to 5 days.

References:

https://www.thepaleomom.com/the-great-dairy-debate/

https://www.thepaleomom.com/5-easy-swaps-favorite-dairy-products/

http://www.healthline.com/nutrition/dairy-substitutes

https://yumuniverse.com/plant-powerful-dairy-free-milk/


Comment

Co-Founder | Nutritionist

Lisa is the Co-Founder and Nutritionist at Tuesday Foods. Always dressed for action in her workout clothes, Lisa found her calling as a fitness and nutrition expert from her background in the sport of gymnastics – learning early on that how you feel, and how well you perform is directly related to what you eat, and how you move your body every day. A former competitive gymnast and coach, Lisa holds a BS in Exercise Physiology, a MS in Nutritional Science, and is a Certified Nutritionist and Health Coach.

Print Friendly and PDF

Citrus Beet Salad

shutterstock_1079471750.jpg

Roasted Beet Salad: Sweet, Colorful and Delicious!

I love to make a light meal out of a cool and refreshing roasted beet salad, and this one comes complete with a sweet and citrusy vinaigrette, plenty of plant protein and creamy goat cheese!

  • 4 Roasted Beets (roasting directions below)

  • 1/2 cup Quinoa (uncooked, dry)

  • 2 tbsps Extra Virgin Olive Oil

  • ½ Navel Orange (juiced)

  • 1 tbsp Apple Cider Vinegar

  • 1 tsp Dijon Mustard

  • Sea Salt & Black Pepper (to taste)

  • 2 cups Arugula or Baby Spinach

  • 1/4 cup Radishes (finely sliced)

  • 2 Carrot (medium, peeled into ribbons)

  • 1 cup Chickpeas (cooked, from the can)

  • 1/4 cup Goat Cheese (crumbled)

  • 1/2 cup Mint Leaves (chopped)

Preheat the oven to 375ºF (190ºC). Wrap the beets in foil and bake for 35 to 45 minutes, or until tender when pierced with a fork.

Remove the beets from the oven and once they have cooled, rinse them under cold water and peel them. Once they are peeled, cut into quarters.

Cook your quinoa on the stove according to package directions, and set aside.

Make the dressing by combining the olive oil, orange juice, apple cider vinegar, dijon, salt and pepper in a jar. Mix well.

Add the arugula or baby spinach to a bowl and top with beets, quinoa, radishes, carrots, chickpeas, goat cheese, and mint. Drizzle dressing over top and enjoy!

Print Friendly and PDF
Comment

Co-Founder | Nutritionist

Lisa is the Co-Founder and Nutritionist at Tuesday Foods. Always dressed for action in her workout clothes, Lisa found her calling as a fitness and nutrition expert from her background in the sport of gymnastics – learning early on that how you feel, and how well you perform is directly related to what you eat, and how you move your body every day. A former competitive gymnast and coach, Lisa holds a BS in Exercise Physiology, a MS in Nutritional Science, and is a Certified Nutritionist and Health Coach.

Print Friendly and PDF

Energizing Matcha Green Tea Smoothie

jose-soriano-1230030-unsplash.jpg

This naturally sweet matcha smoothie is a healthy, antioxidant-filled breakfast or great afternoon pick-me-up.

Matcha is very finely ground, high quality, green tea powder. It’s sweeter than steeped green tea and is super healthy because all of those amazing green tea antioxidants are more concentrated.

Energizing Matcha Green Tea Smoothie

Ingredients

  • 1 cup of unsweetened almond milk (or other non-dairy milk)

  • 1 scoop of vanilla protein powder (your choice, no added sugar)

  • 1-2 tsp matcha green tea powder (start with less if you’re new to matcha - it packs a kick!)

  • 1 frozen banana

  • Ice cubes (optional)

  • 1 large handful of spinach or kale (optional, but recommended)

Combine all ingredients into a blender and blend until desired smoothness is achieved. Sip and enjoy!


Comment

Co-Founder | Nutritionist

Lisa is the Co-Founder and Nutritionist at Tuesday Foods. Always dressed for action in her workout clothes, Lisa found her calling as a fitness and nutrition expert from her background in the sport of gymnastics – learning early on that how you feel, and how well you perform is directly related to what you eat, and how you move your body every day. A former competitive gymnast and coach, Lisa holds a BS in Exercise Physiology, a MS in Nutritional Science, and is a Certified Nutritionist and Health Coach.

Print Friendly and PDF

4 Ways To Beat Fatigue.......Naturally

barbara-alcada-444753-unsplash.jpg

4 Easy Ways to Beat Fatigue...Naturally!

In today’s world, we are constantly on the go, a steady state “busy-ness” is the norm, and we’re always running from one responsibility to the next - literally! So, it’s no wonder that physical fatigue is such a common complaint.

The good news is that there are some really simple (and natural) ways to increase your energy so you can keep up with your busy life.

Get off the blood sugar roller coaster

One of the simplest ways we can boost our energy is to stabilize blood sugar. When we don’t eat enough food throughout the day or when we eat foods that are higher in sugar, our energy levels bottom out.

You can balance your blood sugar, and boost your energy naturally by:

● Eating every 3-4 hours gives your body the nutrients and fuel it needs to keep your blood sugar - and energy levels steady

● Consuming foods that are low on the glycemic index (think fruits and veggies, whole grains) instead of the higher sugar white breads and pastas.

● Eating protein with every meal to slow down the release of carbohydrates into your bloodstream. Protein is broken down and released slower so you’re less likely to have a blood sugar spike and subsequent crash.

Move your body

When you’re tired, the last thing you want to do is exercise. However, as hard as it can be to get your butt off the couch, it’s one of the best things you can do to fight fatigue.

And, it turns out that you don’t even have to commit to a long workout!

A California State University study concluded that even a brisk 10-minute walk can increase your energy for up to 2 hours.

So when you feel that afternoon slump coming on, skip the coffee and lace up your running shoes instead.

Up your sleep game

It may seem obvious that lack of sleep causes fatigue. However did you know that the quality of your sleep can have an even bigger impact on your daily energy? Even slight disturbances in our sleep can affect how rested we feel the next day.

Here are a couple of tips for a more restful sleep:

● Avoid tech in the bedroom, or within 1-2 hours of bedtime. Even the small amount of light, especially the blue light emitted from devices, interrupts your body’s circadian rhythm. Your brain still thinks it’s daytime and won’t wind down.

● Avoid caffeine late in the day - or avoid all together if this is a problem for you

● Try to create a regular sleep/wake schedule to help your body develop a sleep routine = good sleep hygiene.

● Take a hot epsom salt bath, and enjoy a cup of hot herbal tea before bed

● Dab a bit of calming lavender essential oil on your temples before bed or put a few drops on your pillow. Breathe in the calm.

Drink up

Before you reach for that coffee or energy drink to perk you up, consider switching to plain old water. While caffeine is usually the first choice for busting out of an energy slump, it can be dehydrating.

And then there’s dehydration. Even mild dehydration impairs our concentration, decreases our mood and zaps our energy.

How do you know if you may be dehydrated?

Check the color of your urine. If it’s the color of straw, you’re good to go. If it’s a darker yellow color, it’s time to drink up.

If you’re still craving a caffeine hit, try the Energizing Matcha Smoothie recipe below.

Matcha gives a longer lasting energy boost than coffee. It doesn’t hit you hard and then cause you to crash. Plus the recipe really is delicious!

Recipe: Energizing Vanilla Matcha Smoothie

Ingredients

  • 1 cup of unsweetened almond milk (or other non-dairy milk)

  • 1 scoop of vanilla protein powder (your choice, no added sugar)

  • 1-2 tsp matcha green tea powder (start with less if you’re new to matcha - it packs a kick!)

  • 1 frozen banana

  • Ice cubes (optional)

  • 1 large handful of spinach or kale (optional, but recommended)

Combine all ingredients into a blender and blend until desired smoothness is achieved. Sip and enjoy!

References

Glycemic Index Foundation - https://www.gisymbol.com/about-glycemic-index/

California State University Long Beach, Public Affairs & Publications - https://web.csulb.edu/misc/inside/archives/vol_58_no_4/1.htm

National Sleep Foundation - https://sleepfoundation.org/press-release/what-good-quality-sleep

Time.com Health Land - http://healthland.time.com/2012/01/19/bad-mood-low-energy-there-might-be-a-simple-explanation/

Comment

Co-Founder | Nutritionist

Lisa is the Co-Founder and Nutritionist at Tuesday Foods. Always dressed for action in her workout clothes, Lisa found her calling as a fitness and nutrition expert from her background in the sport of gymnastics – learning early on that how you feel, and how well you perform is directly related to what you eat, and how you move your body every day. A former competitive gymnast and coach, Lisa holds a BS in Exercise Physiology, a MS in Nutritional Science, and is a Certified Nutritionist and Health Coach.

Print Friendly and PDF

Spring Recipe: Pasta With Artichokes and English Peas

shutterstock_374840734.jpg

With spring comes the arrival of new vegetables, like artichokes and peas. Basically just new things for me to play with in the kitchen, and that’s always a good thing.

Why I love this:

Peas are EXCELLENT source of plant protein!  A 3/4 cup serving contains 100 calories and more protein than a tablespoon of peanut butter or a whole egg.

Artichokes are low in fat while rich in fiber, vitamins, minerals, and antioxidants. Particularly high in folate and vitamins C and K, they also supply important minerals, such as magnesium, phosphorus, potassium, and iron.


Pasta with Artichokes and English Peas

Ingredients

  • 1/4 cup extra virgin olive oil

  • 1 clove garlic, minced or grated

  • 1 tablespoon chopped fresh thyme

  • 1 (12 ounce) jar marinated artichoke hearts, drained

  • 1/4 cup green olives

  • 1 pinch crushed red pepper flakes

  • 1 cup white wine

  • kosher salt and black pepper

  • 1 pound rigatoni or any pasta you prefer

  • 1 cup peas (frozen or fresh work well here)

  • 1/4 cup grated parmesan cheese

  • zest and juice of 1 lemon

  • 1/4 cup fresh basil, chopped

  • fresh peas and pea sprouts, for serving (optional)

Instructions

1. Heat the olive oil in a large skillet over medium heat. Add the garlic, thyme, artichokes, olives, and a pinch of crushed red pepper flakes. Cook until the artichokes begin to crisp on the edges, about 5 minutes. Remove from the heat. Reserve 1/4 cup of the artichokes and then transfer the rest of the mixture to a food processor and pulse until a paste forms.

2. Return the artichoke mix to the skillet. Add the reserved artichokes, wine, and season with salt and pepper. Simmer over medium heat until reduced by about 1/3.

3. Bring a large pot of salted water to a boil and boil the pasta to al dente. During the last minute of cooking, add the peas to the water. Reserve 1 cup of the pasta cooking water and then drain.

4. Toss the hot pasta and peas with the artichokes. Add the parmesan, lemon zest, juice, basil, and enough of the pasta cooking water to create a sauce. Taste and season with salt and pepper.

5. Divide the pasta among plates. Serve with extra parmesan and red pepper flakes. Enjoy!

Print Friendly and PDF
Comment

Co-Founder | Nutritionist

Lisa is the Co-Founder and Nutritionist at Tuesday Foods. Always dressed for action in her workout clothes, Lisa found her calling as a fitness and nutrition expert from her background in the sport of gymnastics – learning early on that how you feel, and how well you perform is directly related to what you eat, and how you move your body every day. A former competitive gymnast and coach, Lisa holds a BS in Exercise Physiology, a MS in Nutritional Science, and is a Certified Nutritionist and Health Coach.

Print Friendly and PDF

10 Signs Of Hormonal Imbalance

jeremy-thomas-75753-unsplash.jpg

Hormones are like chemical messengers, and govern nearly every cellular action in our body.

While very important, our sex hormones like estrogen, progesterone and testosterone, are actually not essential for our survival.

They’re responsible for sexual functioning and fertility, as well as in more of a “beauty” capacity - keeping our skin, hair & nails vital and youthful looking.

On the other hand, stress hormones (like cortisol & epinephrine, also known as adrenaline) are critical to our survival because they synthesize proteins, maintain cellular electrolyte balance, regulate heartbeat and blood pressure, and transport glucose into our cells - essentially feeding our brain.

These hormones are so crucial, that in times of chronic stress, cortisol (the “hormone of stress”) will be made at the expense of sex hormones. No wonder we can start feeling whacked out at certain stages of life!

So what happens when hormones stop playing well together?

We can often experience a ripple effect, even when there’s a slight hiccup in hormone function.

Also, due to the fact that the interconnected nature of your endocrine system, one hormonal imbalance can lead to an additional one, causing multiple symptoms and overlapping health issues.

The 10 most common signs that you probably have a hormonal imbalance

1. Poor sleep - not being able to fall asleep or stay asleep

2. Fatigue that’s not alleviated by sleep

3. Night sweats and hot flashes

4. Resistant excess weight and body fat, especially around the belly

5. Low libido or sexual dysfunction

6. Acne or other skin issues

7. PMS symptoms

8. Foggy thinking (brain fog!) and difficulty concentrating

9. Mental health issues - depression and anxiety in particular

10. Mood changes like irritability and anger

The main causes of hormonal imbalances

While there are many causes, here are the most common ones that have been identified:

- Age and stage of life

- Chronic stress

- Medications (like the birth control pill)

- Toxins and endocrine disruptors like xenoestrogens

- Poor nutrition and lack of adequate key nutrients

- Blood sugar regulation problems

- Disrupted circadian rhythm

- Chronic inflammation (e.g. leaky gut & digestive system inflammation)

Simple ways to support and re-balance your hormones naturally

Eat whole foods: processed, packaged foods offering little to no nutritive value will also offer little to no fuel for your hormones.

Be sure to eat fresh over packaged foods, including plenty of vegetables, fruits, and quality sources of free range and grass fed meats and eggs. Also, if tolerated - nuts, seeds, and legumes in moderation.

Grains and dairy may cause or exacerbate hormonal problems for some people.

Eat more good fats: Good fats are essential for hormonal health because sex hormones need fat as a building block - and your body can only use the ones you give it.

Opt for sources of good fats from whole foods, such as avocados, raw nuts & seeds, coconut oil, extra virgin olive oil, real butter or ghee (grass fed preferable), wild-caught salmon, and free range eggs - yes, you can eat the yolks!

Exercise daily: Working out on a regular basis, engaging in resistance (or strength) training, and incorporating a specific workout called HIIT (high intensity interval training) has been proven to be especially beneficial for keeping our bodies AND our hormones fit.

Better sleep: getting deeper, more restorative sleep can be the key to supporting your hormones, above all other measures (but that doesn’t mean you should ignore the other ones!)

Stress management & self-care: the truth is - stress can be devastating for hormonal health.

We need to equip ourselves to manage the stress and “business” of everyday life through the actions that bring back balance and wellbeing to our bodies AND our minds - like good nutrition, exercise and sleep!

Learn better coping mechanisms (like breathing techniques), practice mindfulness and be sure to engage in daily self-care.

Recipe:

Hormone-Friendly Chocolate-Coconut Fat Bombs

Ingredients:

  • ½ cup almond or other nut butter, no sugar-added (if nut-sensitive, use sesame tahini or sunflower seed butter)

  • ½ cup virgin coconut oil

  • 3 Tbs raw, unprocessed cacao powder

  • stevia, or monk fruit to sweeten to taste

  • silicone candy moud or mini-muffin pan

Optional add-ins:

- splash of real vanilla extract or vanilla powder

- cinnamon or ginger

- pinch of Himalayan pink salt or Celtic grey salt

How to prepare:

1. In a large skillet melt coconut oil and nut butter over low heat.

2. Stir in cacao powder and desired sweetener.

3. Remove from heat and add vanilla (+ other add-ins), if using.

4. You may want to pour mixture into a “spouted” cup to make pouring easier.

5. Pour mixture into silicone candy molds or mini-muffin pan (about 1 Tb of mixture)

6. Put in freezer or fridge until set.

7. Remove from molds and store in the fridge in an airtight container.

Be mindful that each fat bomb is considered a full serving of fat - great for curbing the appetite, satisfying a sweet tooth and supporting your hormones with the building blocks they need!

Comment

Co-Founder | Nutritionist

Lisa is the Co-Founder and Nutritionist at Tuesday Foods. Always dressed for action in her workout clothes, Lisa found her calling as a fitness and nutrition expert from her background in the sport of gymnastics – learning early on that how you feel, and how well you perform is directly related to what you eat, and how you move your body every day. A former competitive gymnast and coach, Lisa holds a BS in Exercise Physiology, a MS in Nutritional Science, and is a Certified Nutritionist and Health Coach.

Print Friendly and PDF

Baked Marinated Halibut Fillets

Why I love this: Halibut is high in brain-boosting omega-3 fatty acids, plus it’s a great source of essential vitamins and minerals including magnesium, selenium, phosphorous, and vitamin B. As for taste, halibut is a tender and neutral white fish that is delicious when paired with this flavorful marinade. You can pair this dish with roasted vegetables like cauliflower and carrots or over an abundant pile of fresh or sautéed greens (my personal favorite!)

shutterstock_1229158903.jpg
Print Friendly and PDF

Ingredients

  • 6 tablespoons olive oil

  • 3 small garlic cloves, peeled and minced

  • 1 teaspoon dried basil

  • 1 teaspoon salt

  • 1 teaspoon black pepper

  • 2 tablespoons lemon juice

  • 4 6-ounce halibut fillets, skin removed

  • Chopped parsley, for garnish, optional

Preparation

In a large sealable plastic bag, combine the 6 tablespoons olive oil, garlic, basil, salt, pepper and lemon juice. Add fish, seal bag, and turn to coat. Refrigerate for at least 30 minutes or up to 2 hours.

Preheat the oven to 400 degrees. Place one sheet of parchment paper in a baking pan or dish. Place the halibut on the parchment paper and bake for 20 minutes. Remove the fish from the oven and turn the heat up to broil. Put the fish back in the oven, under the broiler for 3-5 minutes, being careful not to burn the garlic.

Allow the fish to rest for 10 minutes before serving. Garnish with chopped parsley.


Comment

Co-Founder | Nutritionist

Lisa is the Co-Founder and Nutritionist at Tuesday Foods. Always dressed for action in her workout clothes, Lisa found her calling as a fitness and nutrition expert from her background in the sport of gymnastics – learning early on that how you feel, and how well you perform is directly related to what you eat, and how you move your body every day. A former competitive gymnast and coach, Lisa holds a BS in Exercise Physiology, a MS in Nutritional Science, and is a Certified Nutritionist and Health Coach.

Print Friendly and PDF

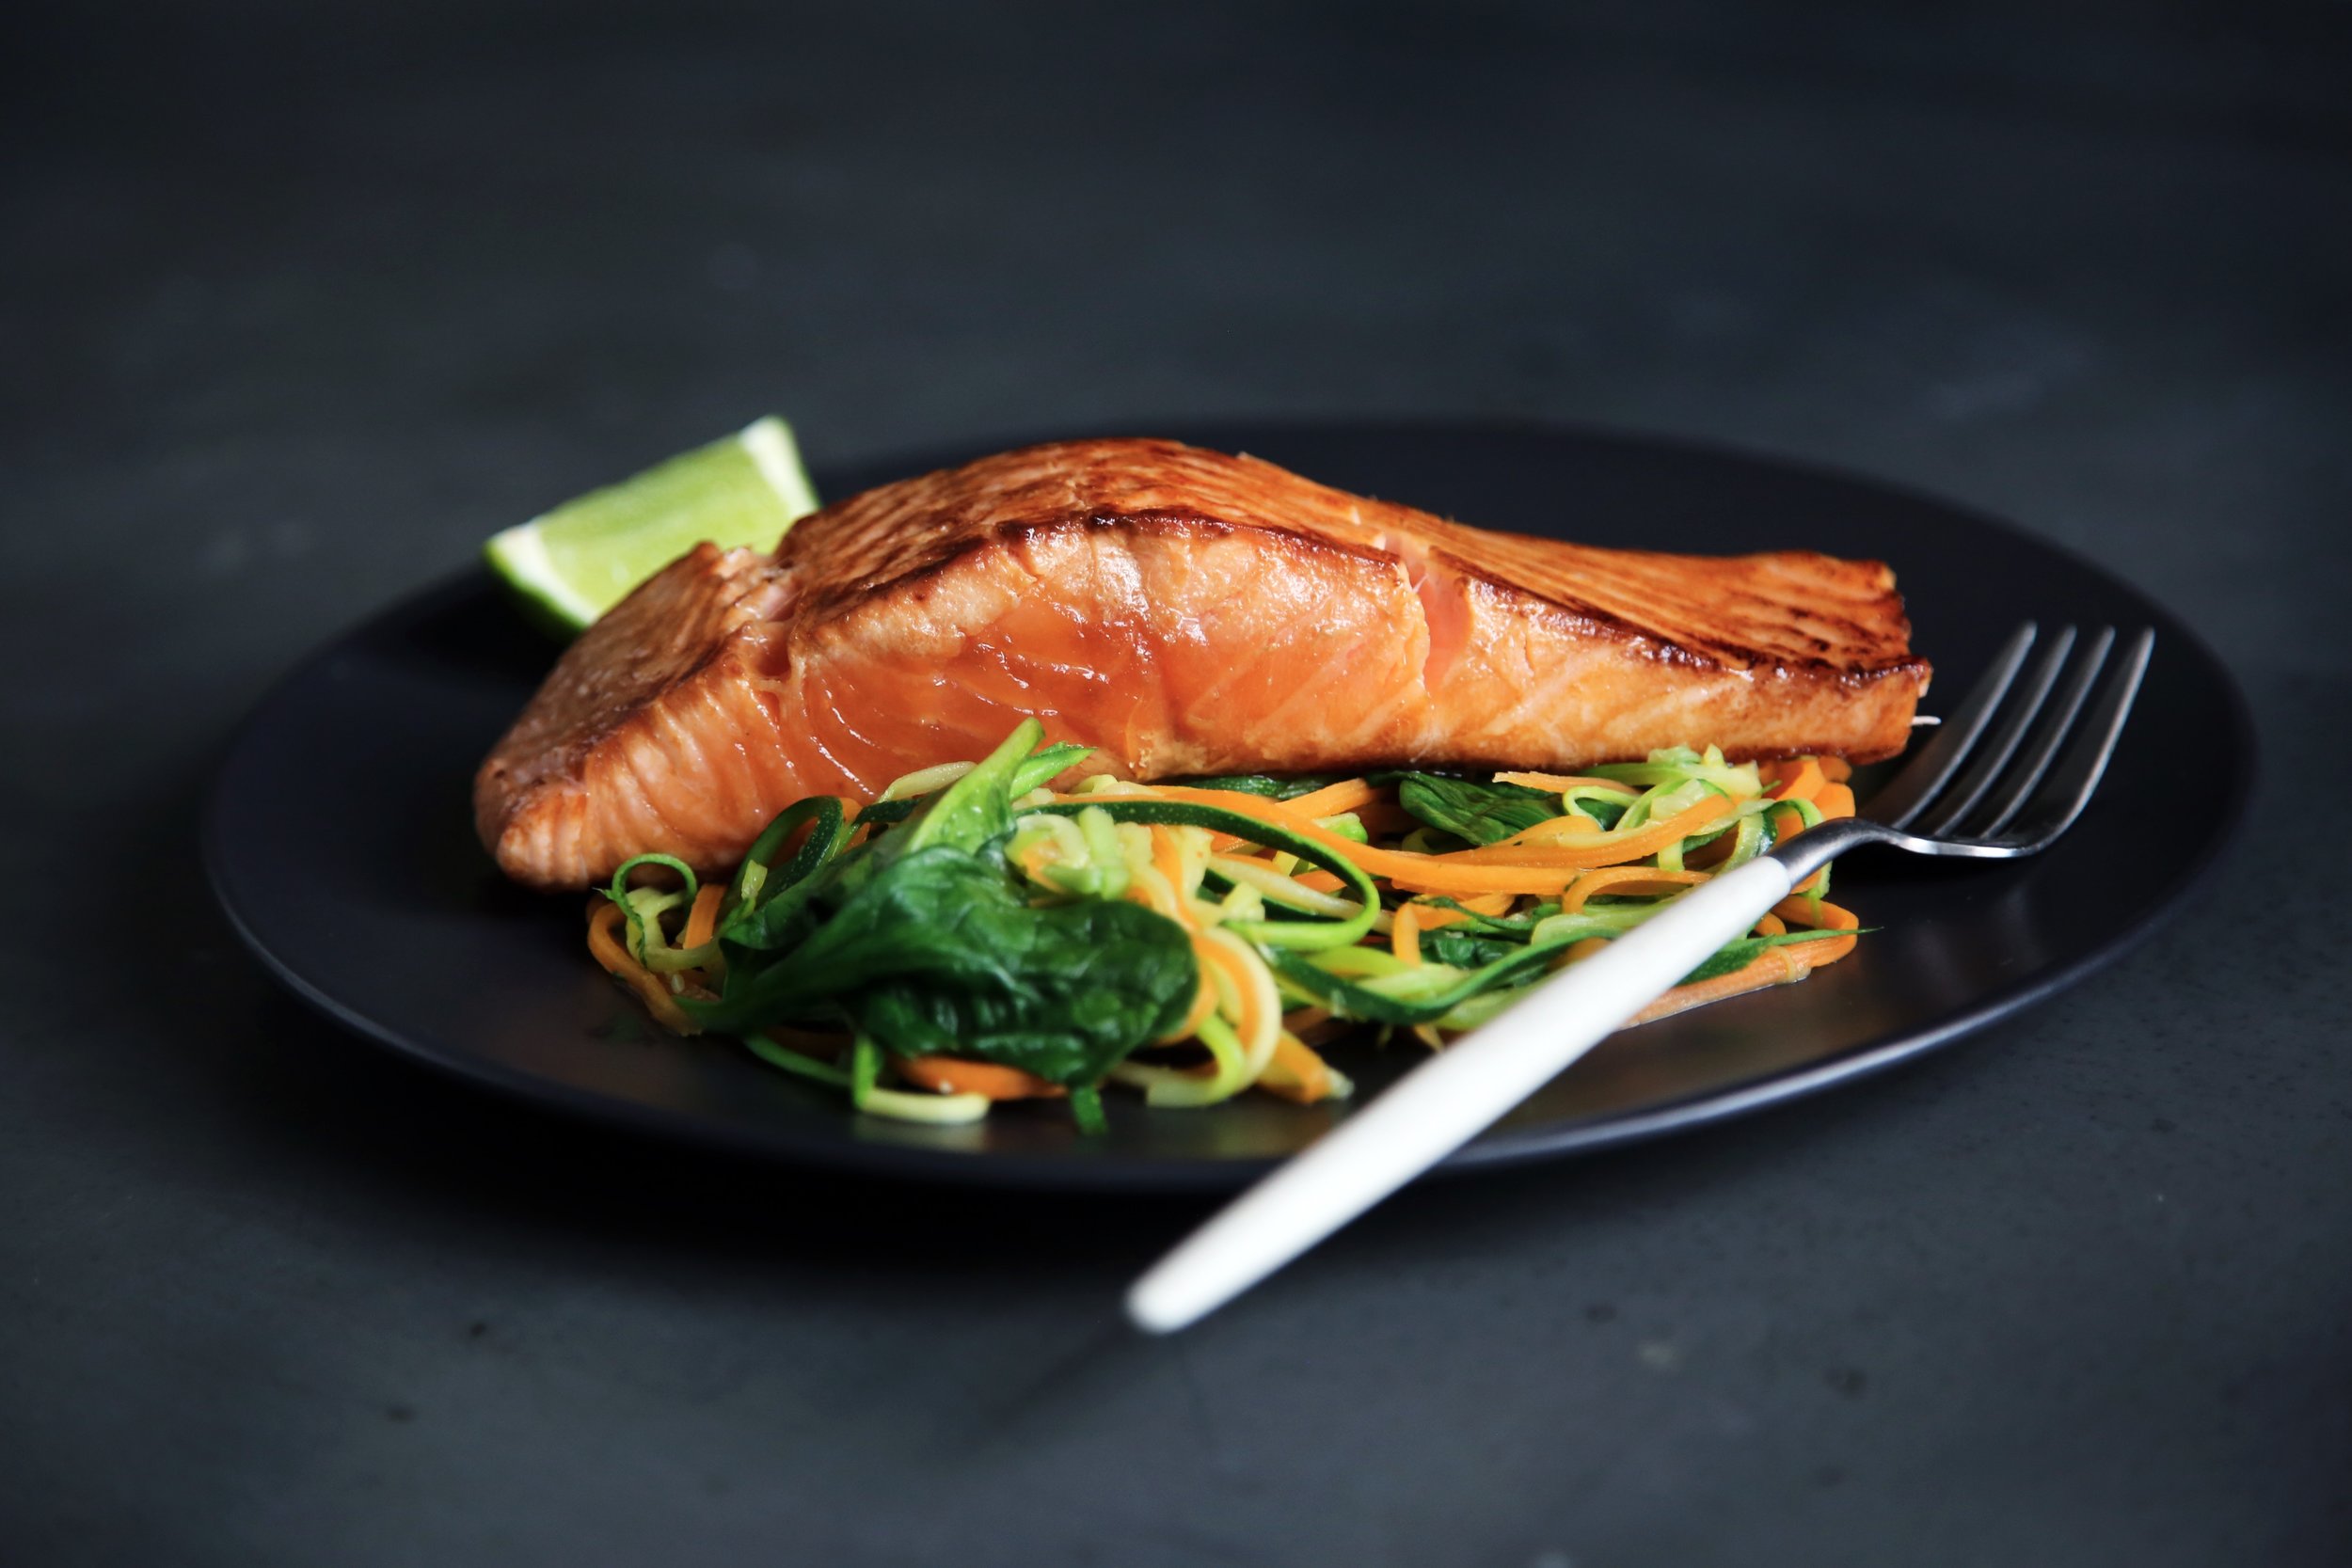
Ginger Salmon

caroline-attwood-576169-unsplash.jpg
Print Friendly and PDF

An easy and flavorful salmon dish that is full of heart-healthy protein, potassium, selenium, B12 and omega-3 fatty acids!

Ingredients:

  • 1/4 cup olive oil

  • 2 tablespoons soy sauce

  • 2 tablespoons rice vinegar

  • 2 tablespoons sesame oil

  • 2 tablespoons brown sugar

  • 2 cloves garlic, pressed

  • 1 tablespoon grated fresh ginger

  • 1 tablespoon sesame seeds

  • 4 green onions, thinly sliced

  • 4 (5-ounce) salmon fillets

For the Honey Ginger Glaze

  • 2 tablespoons honey

  • 1 teaspoon soy sauce

  • 1 teaspoon sesame oil

  • 1/2 teaspoon Sriracha, or more, to taste

  • 1/2 teaspoon grated fresh ginger

  • 1/2 teaspoon sesame seeds

Directions:

To make the glaze: whisk together honey, soy sauce, sesame oil, Sriracha, ginger and sesame seeds in a small bowl; set aside.

In a medium bowl, whisk together olive oil, soy sauce, rice vinegar, sesame oil, brown sugar, garlic, ginger, sesame seeds and green onions.

In a gallon size Ziploc bag or large bowl, combine ginger marinade and salmon filets; marinate for at least 30 minutes to overnight, turning the bag occasionally.

Preheat oven to 400 degrees F. Line a baking dish with parchment paper

Place salmon filets along with the marinade onto prepared baking dish and bake until the fish flakes easily with a fork, 20-30 minutes.

Serve salmon immediately with honey ginger glaze.

Comment

Co-Founder | Nutritionist

Lisa is the Co-Founder and Nutritionist at Tuesday Foods. Always dressed for action in her workout clothes, Lisa found her calling as a fitness and nutrition expert from her background in the sport of gymnastics – learning early on that how you feel, and how well you perform is directly related to what you eat, and how you move your body every day. A former competitive gymnast and coach, Lisa holds a BS in Exercise Physiology, a MS in Nutritional Science, and is a Certified Nutritionist and Health Coach.

Print Friendly and PDF

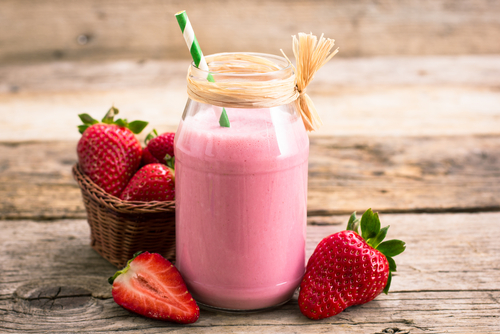
Strawberry Hemp Milk

shutterstock_398479468.jpg

Why I love this:

Hemp seeds are incredibly rich in omega 3 fatty-acids. The omega' 3’s are a natural anti-inflammatory, and critical to brain and nervous system function. They are also important for balancing hormones and promote cardiovascular health. Not to mention they help keep your hair, skin and nails beautiful! Hemp seeds are also a great source of plant-based protein, with 7.5 grams of protein per tablespoon.

This delicious and refreshing hemp milk makes a great post exercise snack or afternoon pick-me-up.

Strawberry Hemp Milk

Serving size: 1
Ingredients
1/4 cup hemp hearts
1 cup water
8-10 strawberries, rinsed (fresh or frozen work well here)
1/2 teaspoon vanilla extract
1/2 teaspoon cinnamon
1/8 teaspoon sea salt
1/2 tablespoon coconut oil
Optional add in: 1/4 inch turmeric and/or ginger

Directions
Add all ingredients to a high-speed blender and blend well .

Print Friendly and PDF
Comment

Co-Founder | Nutritionist

Lisa is the Co-Founder and Nutritionist at Tuesday Foods. Always dressed for action in her workout clothes, Lisa found her calling as a fitness and nutrition expert from her background in the sport of gymnastics – learning early on that how you feel, and how well you perform is directly related to what you eat, and how you move your body every day. A former competitive gymnast and coach, Lisa holds a BS in Exercise Physiology, a MS in Nutritional Science, and is a Certified Nutritionist and Health Coach.

Print Friendly and PDF

Creating A Mindset For Health

simon-migaj-421505-unsplash.jpg

Creating a Mindset for Health

So much of health is all about habits and actions, but where do these all stem from? What if we don’t have to make as many changes as we think we do? What if there was one powerful thing that makes a lot of difference?

That thing is mindset.

Mindset is sometimes called “the story we tell ourselves.” It’s our attitude toward things in our life. And we have control over our mindset.

And research is showing that it may be far more powerful than we thought.

Very interesting health mindset study

Here’s a quick story about a fascinating study.

Researchers at Stanford University observed a group of people's health and wellness lifestyle habits, as well as health markers. The study focuses on how subjective mindsets (e.g., thoughts, beliefs, and expectations) can alter objective reality through behavioral, psychological, and physiological mechanisms.

What they found was that the people who thought they were a lot less active, less healthy and more stressed had a higher risk of death than the general public. And, they also had up to 71% higher risk of death than people who thought they were active and healthy enough. Even if they actually were not!

People who believe doing physical work in a job counts as exercise live longer lives, independent of how much exercise they actually get. Likewise, telling people a milkshake they drank was “indulgent” made them feel more full. Telling them a drink they were consuming had caffeine raised their blood pressure.

So, how is this even possible that people who simply thought they were not active and healthy had higher risks, even if it wasn’t true?

There are a couple of ideas why. One is that maybe if we feel like we're less healthy than we should be, it may make us feel more stressed. And stress isn't good for our mental or physical health. Second, there seems to be a powerful mind-body connection where the body embodies what the mind visualizes.

Researchers don't know why, but what matters is that there is a good mindset. So, let me give you a couple of strategies to boost your mindset for health.

Health mindset strategy 1 - Aim for good enough.

Almost no one eats perfectly seven days a week. It's inevitable that obsessing over the quality and quantity of everything we eat or drink isn't necessarily a great mindset to have.

It can bring on binging, shame, and guilt - none of these are great ways to get healthy. We want to get healthier by making better choices and building better habits. And these are usually best done incrementally - one step at a time.

So, instead of having a black and white approach where everything is good or bad, why not try aiming for good enough to empower ourselves to make better choices, instead of perfect choices.

Health mindset strategy 2 - Stop making tradeoffs

When you try to earn a gluttonous weekend by eating clean during the week, you're making a tradeoff. You're telling yourself that, as long as you're good most of the week, you can go wild on the weekend.

And that's not awesome because the mindset is jumping from one extreme to the other. You're controlling what you do all week, and possibly thinking about how to indulge over the weekend. Just live as though you're trying to do well every single day. Like you care about your health and wellness. You're doing your best, and that's good enough.

Conclusion

Mindset for health can be a powerful tool for better physical health. There’s a proven mind-body connection that research can measure.

Thinking positively, and dropping the black/white and good/bad labels, can help you reach your health goals.

How is your mindset for health? Which of these tips resonate with you the most? How are you going to implement them in your life? Let me know in the comments below.

References:

https://www.health.harvard.edu/blog/mind-over-matter-how-fit-you-think-you-are-versus-actual-fitness-2017081412282


https://www.health.harvard.edu/blog/making-health-decisions-mindsets-numbers-and-stories-201112123946


https://www.precisionnutrition.com/weekend-overeating

Comment

Co-Founder | Nutritionist

Lisa is the Co-Founder and Nutritionist at Tuesday Foods. Always dressed for action in her workout clothes, Lisa found her calling as a fitness and nutrition expert from her background in the sport of gymnastics – learning early on that how you feel, and how well you perform is directly related to what you eat, and how you move your body every day. A former competitive gymnast and coach, Lisa holds a BS in Exercise Physiology, a MS in Nutritional Science, and is a Certified Nutritionist and Health Coach.

Print Friendly and PDF

Good-morning Muesli

daria-nepriakhina-340852-unsplash.jpg

GOOD MORNING MUESLI

  • 3 cups rolled oats

  • 1/2 cup Unsweetened Coconut Flakes

  • 1/2 cup Slivered Almonds

  • 1/2 cup Pumpkin Seeds

  • 1/2 cup dried craberries

  • 1/3 cup Chia Seeds

  • 1/3 cup Cacao Nibs

  • 1/4 tsp Salt

  • Yogurt or nutmilk (for serving)

  • Fresh fruit or berries f(or serving)n

For the dry muesli:

  1. Preheat the oven to 350F. Spread the Oats evenly across a Baking Tray and bake on the top rack of the oven for 10-12 minutes, until golden and fragrant.

  2. Remove the Oats from the oven and add to a large bowl. Pour in the remaining ingredients and stir well.

  3. Transfer the dry Muesli mix to a large jar or container, and store sealed at room temperature for up to one month.

  4. Serve dry muesli with milk of choice or yogurt, fresh fruit or berries

For a single serving:

  • 1/2 cup Dry Muesli Mix

  • 1/2 cup Non-Dairy Milk

  • 1-2 tbsp Non-Dairy Yogurt

  • Optional Add-Ins: 1/4 tsp Cinnamon, 1/8 tsp Orange Zest, Liquid Sweetener to taste


Print Friendly and PDF
Comment

Co-Founder | Nutritionist

Lisa is the Co-Founder and Nutritionist at Tuesday Foods. Always dressed for action in her workout clothes, Lisa found her calling as a fitness and nutrition expert from her background in the sport of gymnastics – learning early on that how you feel, and how well you perform is directly related to what you eat, and how you move your body every day. A former competitive gymnast and coach, Lisa holds a BS in Exercise Physiology, a MS in Nutritional Science, and is a Certified Nutritionist and Health Coach.

Print Friendly and PDF

Sweaty HIIT Workout

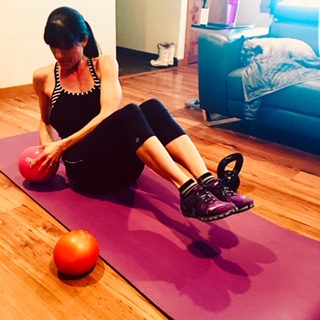
One of Lisa’s favorite client’s doing the Sweaty Hiit workout this morning.

One of Lisa’s favorite client’s doing the Sweaty Hiit workout this morning.

Sweaty HIIT Workout


For this HIIT workout, you’ll perform the exercises for 1 minute each as a circuit. Rest for 30 seconds to 1 minute between exercises. When you’ve completed the circuit of ten exercises, rest for 1 minute and repeat the circuit for a longer workout.

Beginners, start with 10-20 reps per exercise (instead of 1 minute) and work your way up.

As with all workouts, make sure you’re properly warmed up beforehand, and always listen to your body, modifying or stopping as needed.

Click here for a pdf of this workout that includes pictures of each exercise, video and form tips.

Equipment We Used:

  • 8-10 pound dumbbells

  • 6 pound medicine ball

  • Interval timer

  • Flat bench

HIIT Workout Breakdown:

Advanced: 1 minute for each exercise: 30 second - 1 minute recovery

Beginners: 10-20 reps: of each exercise: 30 seconds- 1 minute recovery

  1. Mountain Climber (link to video)

    Support your body on your toes and hands with one knee bent and drawn up into your chest and the other leg straight out behind.. Alternate jumping your feet in and out, bringing your knees into your chest each time and keeping your hands on the floor.

  2. Step Up (link to video)

    Stand upright with one foot on a bench, holding the dumbbells by your sides with your arms straight. Alternate Right and Left.

  3. Push Press (link to video)

    Stand upright holding dumbbells at shoulder height with your elbows bent and palms forward. Bend your hips and knees slightly. Quickly thrust the dumbbells overhead, extending your arms and legs.

  4. Burpee (link to video)

    Start in the top of a push up position. Jump your feet in, bringing your knees to your chest while keeping your hands on the floor. Come to an upright position and jump into the air, raising your arms overhead. To modify, do not do the jump.

  5. Bench Jack Knife (link to video)

    Lie your body across a bench with your legs straight out,holding the side of the bench.Lift your upper body into a crunch while also bringing your knees into your chest. Lower your upper body and legs back out straight and repeat.

  6. Swing (link to video)

    Squat holding a dumbbell in both hands between your legs with your arms straight. Thrust your hips forward, swinging the dumbbell out and up overhead with your arms straight.

  7. Russian Twist (link to video)

    Start in a sit up position with your feet up off the floor, knees bent, holding a medicine ball at chest level. Twist your torso to one side, lowering the medicine ball towards the ground. Twist your torso back to the other side, keeping your feet up throughout.

  8. Squat Jump (link to video)

    Stand upright with your hands to the sides of your head. Bend at the hips and knees into a semi-squat position leaning your torso slightly forward. Push off your feet, jumping straight up. Land in semi-squat and repeat the jump

  9. Walking Pushups (link to video)

    Start in a low push up position with one hand directly under your shoulder and the other slightly in front. Push up to a straight arm position and move the backhand forward about 12 inches. Lower your body back to the start position and repeat this time moving the other hand forward in a walking motion.

  10. Jumping Jacks (link to video)


Comment

Co-Founder | Nutritionist

Lisa is the Co-Founder and Nutritionist at Tuesday Foods. Always dressed for action in her workout clothes, Lisa found her calling as a fitness and nutrition expert from her background in the sport of gymnastics – learning early on that how you feel, and how well you perform is directly related to what you eat, and how you move your body every day. A former competitive gymnast and coach, Lisa holds a BS in Exercise Physiology, a MS in Nutritional Science, and is a Certified Nutritionist and Health Coach.

Print Friendly and PDF

Roasted Beet Hummus

shutterstock_405735640.jpg

Add a bit of color to your life with this roasted beet hummus! This delicious dip is light, flavorful, and super easy to make. Once you have roasted the beets, you just toss everything else into the blender or food processor, whirl it around, and it’s done. This hummus will keep for 7 days in the fridge, so it’s the perfect make ahead snack or lunch option.

Ingredients:

  • 1 -2 roasted beets

  • 1 15-oz. can chickpeas (drained and rinsed)

  • 1 lemon, zested

  • 1/2 large lemon, juiced

  • 1 good pinch salt and black pepper

  • 1 tsp cumin

  • 1-2 cloves garlic

  • 2 Tbsp tahini

  • 1/4 cup extra virgin olive oil

First roast the beets…..You will need one for this recipe.

Preheat oven to 375 degrees F remove the stem and most of the root from your beets, and scrub and wash them underwater until clean.

Wrap beet and the garlic together in foil, drizzle on a bit of olive oil, wrap tightly, and roast for 40 minutes or until a knife inserted falls out easily. They should be very tender. Set in the fridge (in a bowl - it can be a mess) to cool to room temperature.

Once cooled, the skin can be removed easily.

Next……

  1. Once your beet is cooled and peeled, quarter it and place it in your food processor. Blend until only small bits remain.

  2. Add remaining ingredients except for olive oil and blend until smooth.

  3. Drizzle in olive oil as the hummus is mixing.

  4. Taste and adjust seasonings as needed, adding more salt, lemon juice, or olive oil if needed. If it’s too thick, add a bit of water.

Print Friendly and PDF
Comment

Co-Founder | Nutritionist

Lisa is the Co-Founder and Nutritionist at Tuesday Foods. Always dressed for action in her workout clothes, Lisa found her calling as a fitness and nutrition expert from her background in the sport of gymnastics – learning early on that how you feel, and how well you perform is directly related to what you eat, and how you move your body every day. A former competitive gymnast and coach, Lisa holds a BS in Exercise Physiology, a MS in Nutritional Science, and is a Certified Nutritionist and Health Coach.

Print Friendly and PDF

Superfoods: Broccoli and Kale

shutterstock_154023704.jpg

What Makes Broccoli and Kale Superfoods?

Broccoli and kale are often touted to be “superfoods.” And, yes, they really are amazingly healthy for you.

If you’re wondering what exactly is in these green powerhouses that makes them so “super,” I am diving into the research to give you some nerdy reasons to make these a staple in your diet.

To start, they're both considered cruciferous vegetables related to each other in the Brassica family. This family of super plants also includes cauliflower, cabbage, mustard greens, and Brussels sprouts.

These superfoods have a ton of nutrition, and other health-promoting compounds, they're inexpensive and easy to cook too!

Super nutrition

Broccoli and kale are full of nutrition: vitamins, minerals, fibre, etc. They're both considered to be nutrient dense which is a measure of nutrients per calorie - and these both have a lot!

100 grams of broccoli (about 1 cup, chopped) contains:

● 34 calories

● 2.8 g protein, 0.4 g fat, 6.6 g carbohydrates, and 2.6 g fibre.

● Good source of B vitamins (when eaten raw)

● 100% of your daily vitamin C

● Almost 100% of your vitamin K

● Good source of manganese

● Traces of all the other vitamins and minerals

One cup of loosely packed kale contains:

● 8 calories

● 0.7 g protein, 0.2 g fat (including omega-3), 1.4 g carbohydrates, and 0.6 g fibre.

● Contains pre-vitamin A (beta-carotene).

● Several B vitamins, including B1, B3, B5, B6, and folate (B9)

● Rich in vitamins C and K

● Lots of minerals including manganese, magnesium, iron, potassium, sulfur, copper, phosphorus, and calcium

As you can see, these two foods contain a lot of nutrients.

NOTE: Too much vitamin K may interact with certain blood-thinning medications. If you're taking one of these medications, talk to your doctor or pharmacist before incorporating too much of these superfoods into your diet.

Broccoli and kale also contain other health-promoting compounds.

Super health-promoting compounds

Broccoli and kale tend to taste a bit bitter - but that bitterness equals healthfulness!

This bitter flavor is from some of the health-promoting compounds in these super plant foods. Things like glucosinolates (e.g., sulforaphane and isothiocyanates) and polyphenol flavonols.

There are a few different types of kale - from curly kale, to dinosaur kale, to red/purple kale. The different colours result from slight differences in the amounts of the compounds these plants contain.

One of the main active ingredients in cruciferous vegetables are glucosinolates. These antioxidant compounds are very useful to help detoxify and protect against cancer.

FUN FACT: It's the precursors to glucosinolates that are in cruciferous vegetables, not the compounds themselves. When fresh broccoli and kale are eaten (or even chopped/blended) raw the active compounds are produced. *This fact is incorporated into a trick I use in this week’s recipe*

NOTE: Glucosinolates may affect iodine absorption and thyroid health, particularly in people prone to thyroid disease. In this case, you may not have to ditch these superfoods altogether - just cook them first.

These superfoods also contain flavonols like kaempferol and quercetin. Flavonols have antioxidant and anti-inflammatory properties, and they decrease your risk of cancer.

Kale also contains carotenoids like lutein and zeaxanthin. Carotenoids are known for promoting eye health and are protective against many cancers.

When cooked, kale contains another anti-cancer compound called indole.

Conclusion

Broccoli and kale are cruciferous superfoods. They are packed with nutrition and have a whole array of health-promoting compounds.

Almost everyone should be eating these regularly. Just be cautious if you're taking blood-thinning medications; and, if you have thyroid issues, cook them first.

Do you, or anyone you know, absolutely love (or hate) these superfoods? Do you have a favorite recipe to share? Let me know in the comments below.


Broccoli & Kale Superfood Soup

Serves 4

  • 2 tbsp extra virgin olive oil

  • 1 tbsp garlic, chopped

  • 2 large handfuls kale

  • 4 stalks celery, chopped

  • 4 stalks broccoli chopped

  • 8 cups broth

  • ½ cup tahini

  • 2 tsp sea salt

    Instructions

Sautee garlic in olive oil in a large soup pot. At the same time do steps #2 and #3.

Add half of the raw kale, celery, and broccoli to your high-speed blender (in that order). Cover with up to 4 cups of broth and blend.

Pour soup into the pot with the sauteed garlic. Do the same for the other half of the veggies and broth.

Heat soup and simmer for up to 5 minutes.

Remove from heat. Add tahini and sea salt. Stir well.

Serve & enjoy!

Tip: If you want the soup to be extra creamy, you can re-blend after it's heated.

References:

https://www.thepaleomom.com/wiki/broccoli/

https://ndb.nal.usda.gov/ndb/foods/show/2871?manu=&fgcd=&ds=

https://www.thepaleomom.com/wiki/kale/

https://www.precisionnutrition.com/encyclopedia/food/kale

https://www.thepaleomom.com/kale-superfood-and-delicious-too/

https://nutritionfacts.org/video/the-broccoli-receptor-our-first-line-of-defense-2/

https://nutritionfacts.org/video/second-strategy-to-cooking-broccoli/

https://www.healthline.com/health/food-nutrition/crucifeous-vegetables#1

https://www.healthline.com/nutrition/foods/broccoli#section1

https://www.healthline.com/nutrition/10-proven-benefits-of-kale

https://en.wikipedia.org/wiki/List_of_phytochemicals_in_food#Polyphenols

https://en.wikipedia.org/wiki/Carotenoid#Properties

https://en.wikipedia.org/wiki/Glucosinolate#Humans_and_other_mammals


Comment

Co-Founder | Nutritionist

Lisa is the Co-Founder and Nutritionist at Tuesday Foods. Always dressed for action in her workout clothes, Lisa found her calling as a fitness and nutrition expert from her background in the sport of gymnastics – learning early on that how you feel, and how well you perform is directly related to what you eat, and how you move your body every day. A former competitive gymnast and coach, Lisa holds a BS in Exercise Physiology, a MS in Nutritional Science, and is a Certified Nutritionist and Health Coach.

Print Friendly and PDF

Easy Gluten Free Blueberry Muffins

kaitlyn-chow-554381-unsplash.jpg

This simple recipe for gluten free blueberry muffins is one your family will love. They’re easy to make, healthy and surprisingly moist and delicious! Perfect for busy mornings when you need a healthy breakfast on-the-go.

Ingredients:

  • 1/4 cup Coconut Oil

  • 1/4 cup Raw Honey

  • 3 Large Eggs

  • 2 Banana (overripe, mashed)

  • 1 1/2 tsps Vanilla Extract

  • 1 tsp Apple Cider Vinegar

  • 3/4 tsp Sea Salt

  • 1/2 tsp Baking Powder

  • 3 cups Almond Flour

  • 1 cup Blueberries (fresh or frozen)

  • 2 tbsps Chia Seeds (For topping)

Preheat the oven to 350 F. Line a mini muffin tin with liners

Combine the wet ingredients (first 6) in the food processor until well mixed, about 30 seconds.

Add the sea salt and baking soda and mix another 10 seconds to make sure they are both incorporated well. Add the almond flour and process another 30-45 seconds until well mixed. Unplug the food processor and remove the blade, then gently fold in the blueberries.

Add 1 tablespoon of the batter to each mini muffin cup and bake for 14-15 minutes, until the tops are lightly golden brown and the muffins are cooked through. Sprinkle the chia seeds on top before baking.

Print Friendly and PDF
1 Comment

Co-Founder | Nutritionist

Lisa is the Co-Founder and Nutritionist at Tuesday Foods. Always dressed for action in her workout clothes, Lisa found her calling as a fitness and nutrition expert from her background in the sport of gymnastics – learning early on that how you feel, and how well you perform is directly related to what you eat, and how you move your body every day. A former competitive gymnast and coach, Lisa holds a BS in Exercise Physiology, a MS in Nutritional Science, and is a Certified Nutritionist and Health Coach.

Print Friendly and PDF

Leg Day!

Want a good workout to tone your legs and get burn fat at the same time?

This week I put together this dynamic workout for my clients, and although it was hard, it was also fun, fast moving and extremely effective.

This workout is made up of three components:

1.High intensity interval: Box Jumps

2. Superset: Prisoner Squats + Leg Curl

3. Giant set: Split Lunge + Hip Adduction + Plank

HIIT is a training technique in which you give all-out, one hundred percent effort through quick, intense bursts of exercise, followed by short, recovery periods. This type of training gets and keeps your heart rate up and burns more fat in less time.

A superset is when you perform 2 exercises back-to-back, a giant set is 3 exercises back-to-back.  This is a great way to build muscle, prevent boredom and save time. Because the exercises are performed without rest, they also keep your heart rate up giving you both an aerobic and anaerobic workout.

This Leg Day Workout is intended to be done at the gym, but can easily be modified for a home workout.

Scroll down for video instruction on each exercise and a printable version of the entire workout!


HIIT

Box Jumps X 10   VIDEO


Repeat for 2-3 sets, Rest 1 minute between sets


Superset

Prisoner Squat X 10   VIDEO

Leg curl on Swiss ball X 20   VIDEO


Repeat for 2-3 sets, 1 minute rest between sets, no rest between exercises


Giant Set

Alternating Split Lunge Jump X 20   VIDEO

Hip Adduction X 20   VIDEO

Plank for 45 seconds  VIDEO


Repeat for 2-3 sets, 1 minute rest between sets, no rest between exercises


Click here for a printout of the entire workout!

Co-Founder | Nutritionist

Lisa is the Co-Founder and Nutritionist at Tuesday Foods. Always dressed for action in her workout clothes, Lisa found her calling as a fitness and nutrition expert from her background in the sport of gymnastics – learning early on that how you feel, and how well you perform is directly related to what you eat, and how you move your body every day. A former competitive gymnast and coach, Lisa holds a BS in Exercise Physiology, a MS in Nutritional Science, and is a Certified Nutritionist and Health Coach.

Print Friendly and PDF

Eating For Beauty

shutterstock_565263610.jpg

When it comes to beautiful, radiant skin - "You are what you eat!”

As a matter of fact, your diet as a vital part of your healthy skincare routine, gaining a glowing complexion, and as an aid in slowing down the aging process.

What to Eat for Healthy Skin

There are so many signs and symptoms that tell us that the skin is not as healthy as it should be: dullness, dryness, redness, blemishes, etc.

Healthy skin is a reflection of internal health. There are many creams and cosmetics to put on top of your skin. But, there are also lots of things you can do to nurture and nourish your skin to better health from the inside.

How better to do this than with food?

Your skin needs many nutrients: water, essential fats, vitamins, and amino acids. Here are five foods (and drinks and lifestyle tips) I highly recommend if your goal is healthier-looking skin. As a bonus, I have included a short list of some key foods to consider avoiding.

Let’s dive in.

Skin Food #1 - Water

The skin is about 70% water, so it makes sense that we should keep our daily water intake high to maintain healthy skin. But beyond that, we need water for metabolism, nutrient absorption, elimination and circulation—all of which have a major impact on our skin.

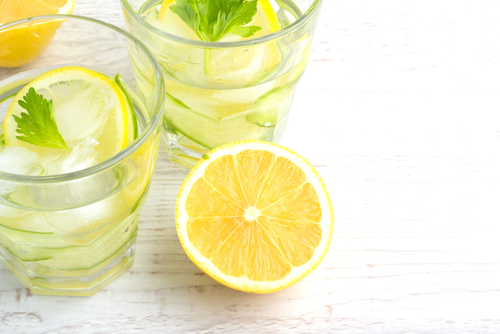
My top picks for healthy hydration are filtered water (add fresh lemon, ginger, cucumbers and herbs for more of an antioxidant boost!) and herbal teas, especially green tea.

Skin Food #2 - Fish, especially wild salmon

Fish contains many nutrients important for skin health - omega-3s, and vitamins A and D to name a few.

Omega-3s are anti-inflammatory to help cool the flames of inflammation. Vitamin A can help with blemishes and dryness, while vitamin D helps with skin tone.

Skin Food #3 - Bell peppers, citrus fruits, and broccoli

Collagen is one of the most abundant proteins in our body. It’s also known to help our skin stay firm and supple.

Vitamin C is necessary for your body to make collagen. So foods rich in vitamin C are great for your skin. Cue: bell peppers, citrus, and broccoli.

NUTRITION FACT: Overcooking vitamin C-rich foods can destroy some of the skin-supporting vitamins. So, try having these lightly steamed or raw for maximum vitamin C levels.

Skin Food #4 - Bone broth

Homemade bone broth contains a lot of the amino acid glycine. Glycine is another essential component of the skin protein collagen.

Glycine helps speed the healing of the skin and the gut. Win-win.

Skin “Food” #5 - Sleep more & stress less

I know these aren’t exactly foods, but they’re an important part of naturally great skin. When we don’t sleep enough, or stress too much our body flips on systems that affect our whole body… including our skin.

Stress hormones can increase inflammation and lead to not-so-healthy looking skin. Prioritize sleep and stress management, and you can see results in your life, and in your skin.

Watch out for these foods

Some foods are allergenic or inflammatory. These can cause all sorts of issues in your body, including affecting your skin.

It's hard to come up with one list of inflammatory or allergenic foods for everyone. Each person is biochemically unique, so you may have to go through this and see what applies to you. There are a few common allergens that may be a good bet to eliminate from your diet.

The first is processed foods. These are pretty much not-so-good for everyone. And they can affect your health in so many ways, including how your skin looks & feels. Try ditching pre-packaged and fast foods in favour of whole foods as much as possible. Not just for your skin, for your whole body (and mind).

The second is gluten. While only a small number of people have serious reactions to gluten (i.e., celiac disease), many more people are intolerant to it. Gluten is a protein found in wheat, barley, rye and a few other grains. Many people have had several health concerns, including skin issues, clear up after eliminating gluten from their diets.

Third in line is dairy. It could be a hormonal response or even an insulin response. We don't quite know why, but many people who cut out dairy report better skin.

Conclusion

Skin health is not just about what you put on your skin, but what your skin gets from the inside too. There are lots of important nutrients and foods to help support healthy skin. Which also means, that there are lots of foods that can affect your skin in negative ways as well.

Hydrating, eating nutrient dense whole foods, and avoiding common allergenic and inflammatory foods might make all the difference for you.

Do you have an awesome recipe or tips for people to eat more of these “skin-healthifying” foods? Let me know in the comments below.

Recipe (Omega-3 vitamin C rich) Salmon Salad with Lemon Vinaigrette

Salmon Salad Serves 2

  • 6 - 8 ounce salmon filet

  • sea salt and pepper

  • fresh lemon juice

  • 4 cups baby spinach, arugula, mixed greens

  • 1 bell pepper, chopped

  • 1 cup cherry tomatoes

  • ½ large cucumber, chopped

Lemon Vinaigrette

  • ⅔ cup olive oil

  • ⅓ cup fresh lemon juice

  • Kosher salt, freshly ground pepper

Whisk oil and lemon juice in a small bowl or shake in a resealable jar to emulsify; season with salt and pepper.

Instructions:

Season the salmon with salt and pepper and bake in 350 degree oven for 20-30 minutes.

Prepare the lemon vinagrette

Remove the salmon from the oven and add a squeeze of fresh lemon

Place 2 cups of greens into each of 2 bowls. Top with veggies and salmon and a drizzle of dressing.

Serve & enjoy!

Tip: Serve with a large mug of green tea for an extra skin-supporting bonus.

References:

https://www.thepaleomom.com/beautiful-skin/

https://www.thepaleomom.com/overcoming-medical-dogma-eczema/

https://www.precisionnutrition.com/all-about-acne-nutrition

https://www.healthline.com/health/4-best-vitamins-for-skin#VitaminD2

https://chriskresser.com/nutrition-for-healthy-skin-part-1/

https://www.healthline.com/health/ways-to-boost-collagen

https://www.healthline.com/nutrition/collagen


Comment

Co-Founder | Nutritionist

Lisa is the Co-Founder and Nutritionist at Tuesday Foods. Always dressed for action in her workout clothes, Lisa found her calling as a fitness and nutrition expert from her background in the sport of gymnastics – learning early on that how you feel, and how well you perform is directly related to what you eat, and how you move your body every day. A former competitive gymnast and coach, Lisa holds a BS in Exercise Physiology, a MS in Nutritional Science, and is a Certified Nutritionist and Health Coach.

Print Friendly and PDF

Lemon Parmesan Chicken with Arugula

1519403185474.jpeg

The BEST Chicken Parmesan.

In this lighter version of the the classic Italian dish, we keep all the deliciousness but lose the heavy mozzarella cheese and pasta. Trust me, everyone will love it!

Ingredients

  • Kosher salt and freshly ground black pepper

  • 2 extra-large eggs

  • 1/2 cup dry bread crumbs (or panko for a gluten-free version)

  • 1/2 cup freshly grated Parmesan cheese

  • 1 teaspoon lemon zest

  • 6 boneless, skinless chicken breasts

  • Unsalted butter

  • Good olive oil

  • 5 ounces arugula

  • 1/4 cup freshly squeezed lemon juice (2 lemons)

  • 1/4 pound chunk Parmesan cheese

Instructions:

Preheat the oven to 350 degrees

1. Season the chicken with salt and pepper. Pound the chicken breasts between two sheets of parchment paper until they are 1/4 inch thick. You can use either a meat mallet or a rolling pin.

2. On a plate, beat the eggs with 1 tablespoon of water. On a second plate, combine the bread crumbs or panko, the 1/2 cup grated Parmesan cheese, and lemon zest , and set aside.

3. Dip both sides of the chicken breast into the egg mixture and dredge both sides in the bread-crumb mixture, pressing lightly.

4. Heat 1 tablespoon of butter and 1 tablespoon of olive oil in a large sauté pan and cook 2 or 3 chicken breasts on medium-low heat for 2 to 3 minutes on each side, until browned. Add more butter and oil and cook the rest of the chicken breasts.

5. Place the browned chicken on a parchment lined baking dish, and bake in the oven for 15 minutes.

6. Place the arugula in a large bowl. In a glass jar, whisk together the 1/4 cup lemon juice, 1/2 cup olive oil, pinch of salt and pepper. Pour enough dressing on the arugula to moisten. Toss well.

To serve - Pile some arugula on top of each hot chicken breast. With a very sharp knife or a vegetable peeler, shave the chunk of Parmesan into large shards and arrange them on top of the arugula.

Print Friendly and PDF
Comment

Co-Founder | Nutritionist

Lisa is the Co-Founder and Nutritionist at Tuesday Foods. Always dressed for action in her workout clothes, Lisa found her calling as a fitness and nutrition expert from her background in the sport of gymnastics – learning early on that how you feel, and how well you perform is directly related to what you eat, and how you move your body every day. A former competitive gymnast and coach, Lisa holds a BS in Exercise Physiology, a MS in Nutritional Science, and is a Certified Nutritionist and Health Coach.

Print Friendly and PDF

The Perfect Homemade Vinaigrette

shutterstock_655448650.jpg

The Perfect Homemade Vinaigrette Recipe

Makes 1 cup

  • 1/2 cup extra balsamic vinegar

  • 1/2 cup extra virgin olive oil

  • 1 teaspoon whole grain mustard

  • 1/4 teaspoon sea salt

  • 1/8 teaspoon freshly ground black pepper

Note:  This recipe works great with any kind of vinegar you love, especially red wine vinegar.  Apple cider vinegar is full of health benefits and is also great in this recipe.  I love high quality, balsamic vinegars....My favorites this summer have been aged Peach or Fig Balsamic.  For the best taste, look for small bottles of well-aged balsamic.  The huge bottles tend to be too acidic. 

Whisk all ingredients except the olive oil in a small bowl, then stream in the olive oil while you continue to whisk until the dressing has emulsified.

For a single serving, use one tablespoon each vinegar and oil, a small dab of mustard (about 1/8 teaspoon and just small pinch of salt and pepper.

Comment

Co-Founder | Nutritionist

Lisa is the Co-Founder and Nutritionist at Tuesday Foods. Always dressed for action in her workout clothes, Lisa found her calling as a fitness and nutrition expert from her background in the sport of gymnastics – learning early on that how you feel, and how well you perform is directly related to what you eat, and how you move your body every day. A former competitive gymnast and coach, Lisa holds a BS in Exercise Physiology, a MS in Nutritional Science, and is a Certified Nutritionist and Health Coach.

Print Friendly and PDF